Using the Web Driver
The K2 Web Driver (link: https://toobefun.com/toolkit/k2) is the gateway to fully customizing your K2. With it, you can easily make your K2 look and work exactly the way you want!
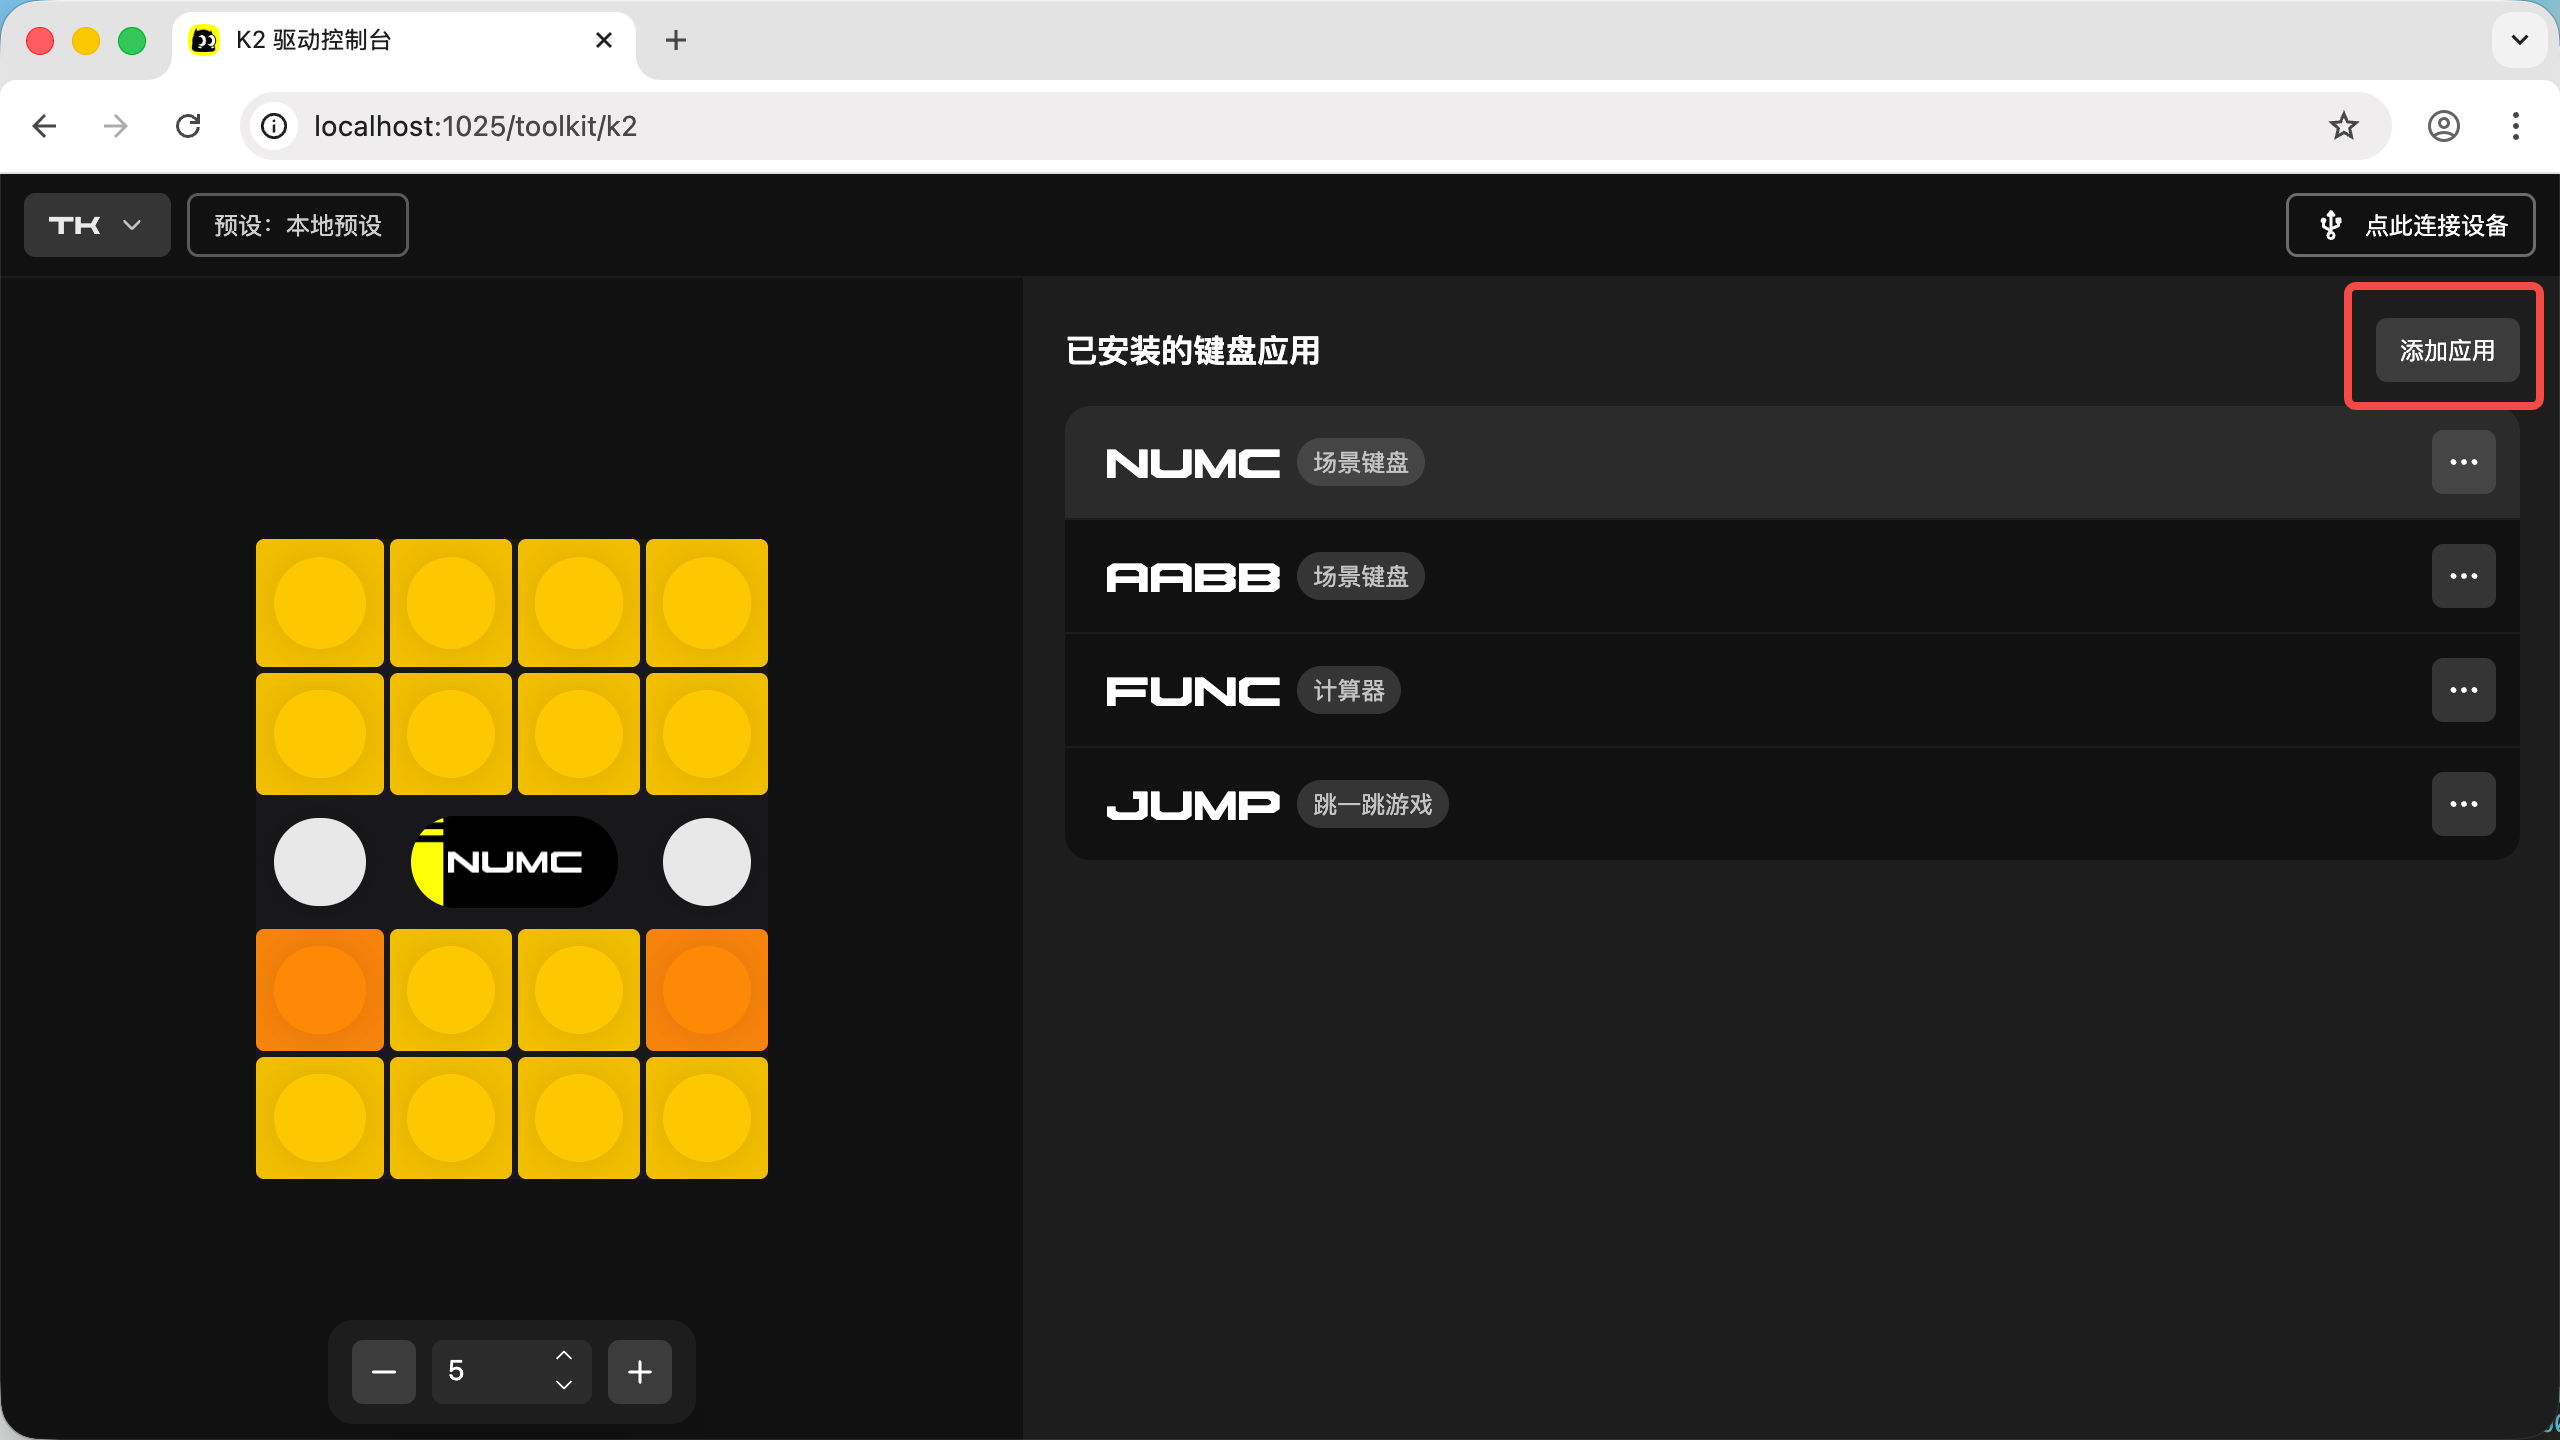
01. Overview of the Main Interface
After visiting https://toobefun.com/toolkit/k2, the interface looks like this:

- On the left is a virtual K2 that simulates your real K2. When you modify the configuration, the virtual K2 updates accordingly — it's almost identical to the K2 in your hands
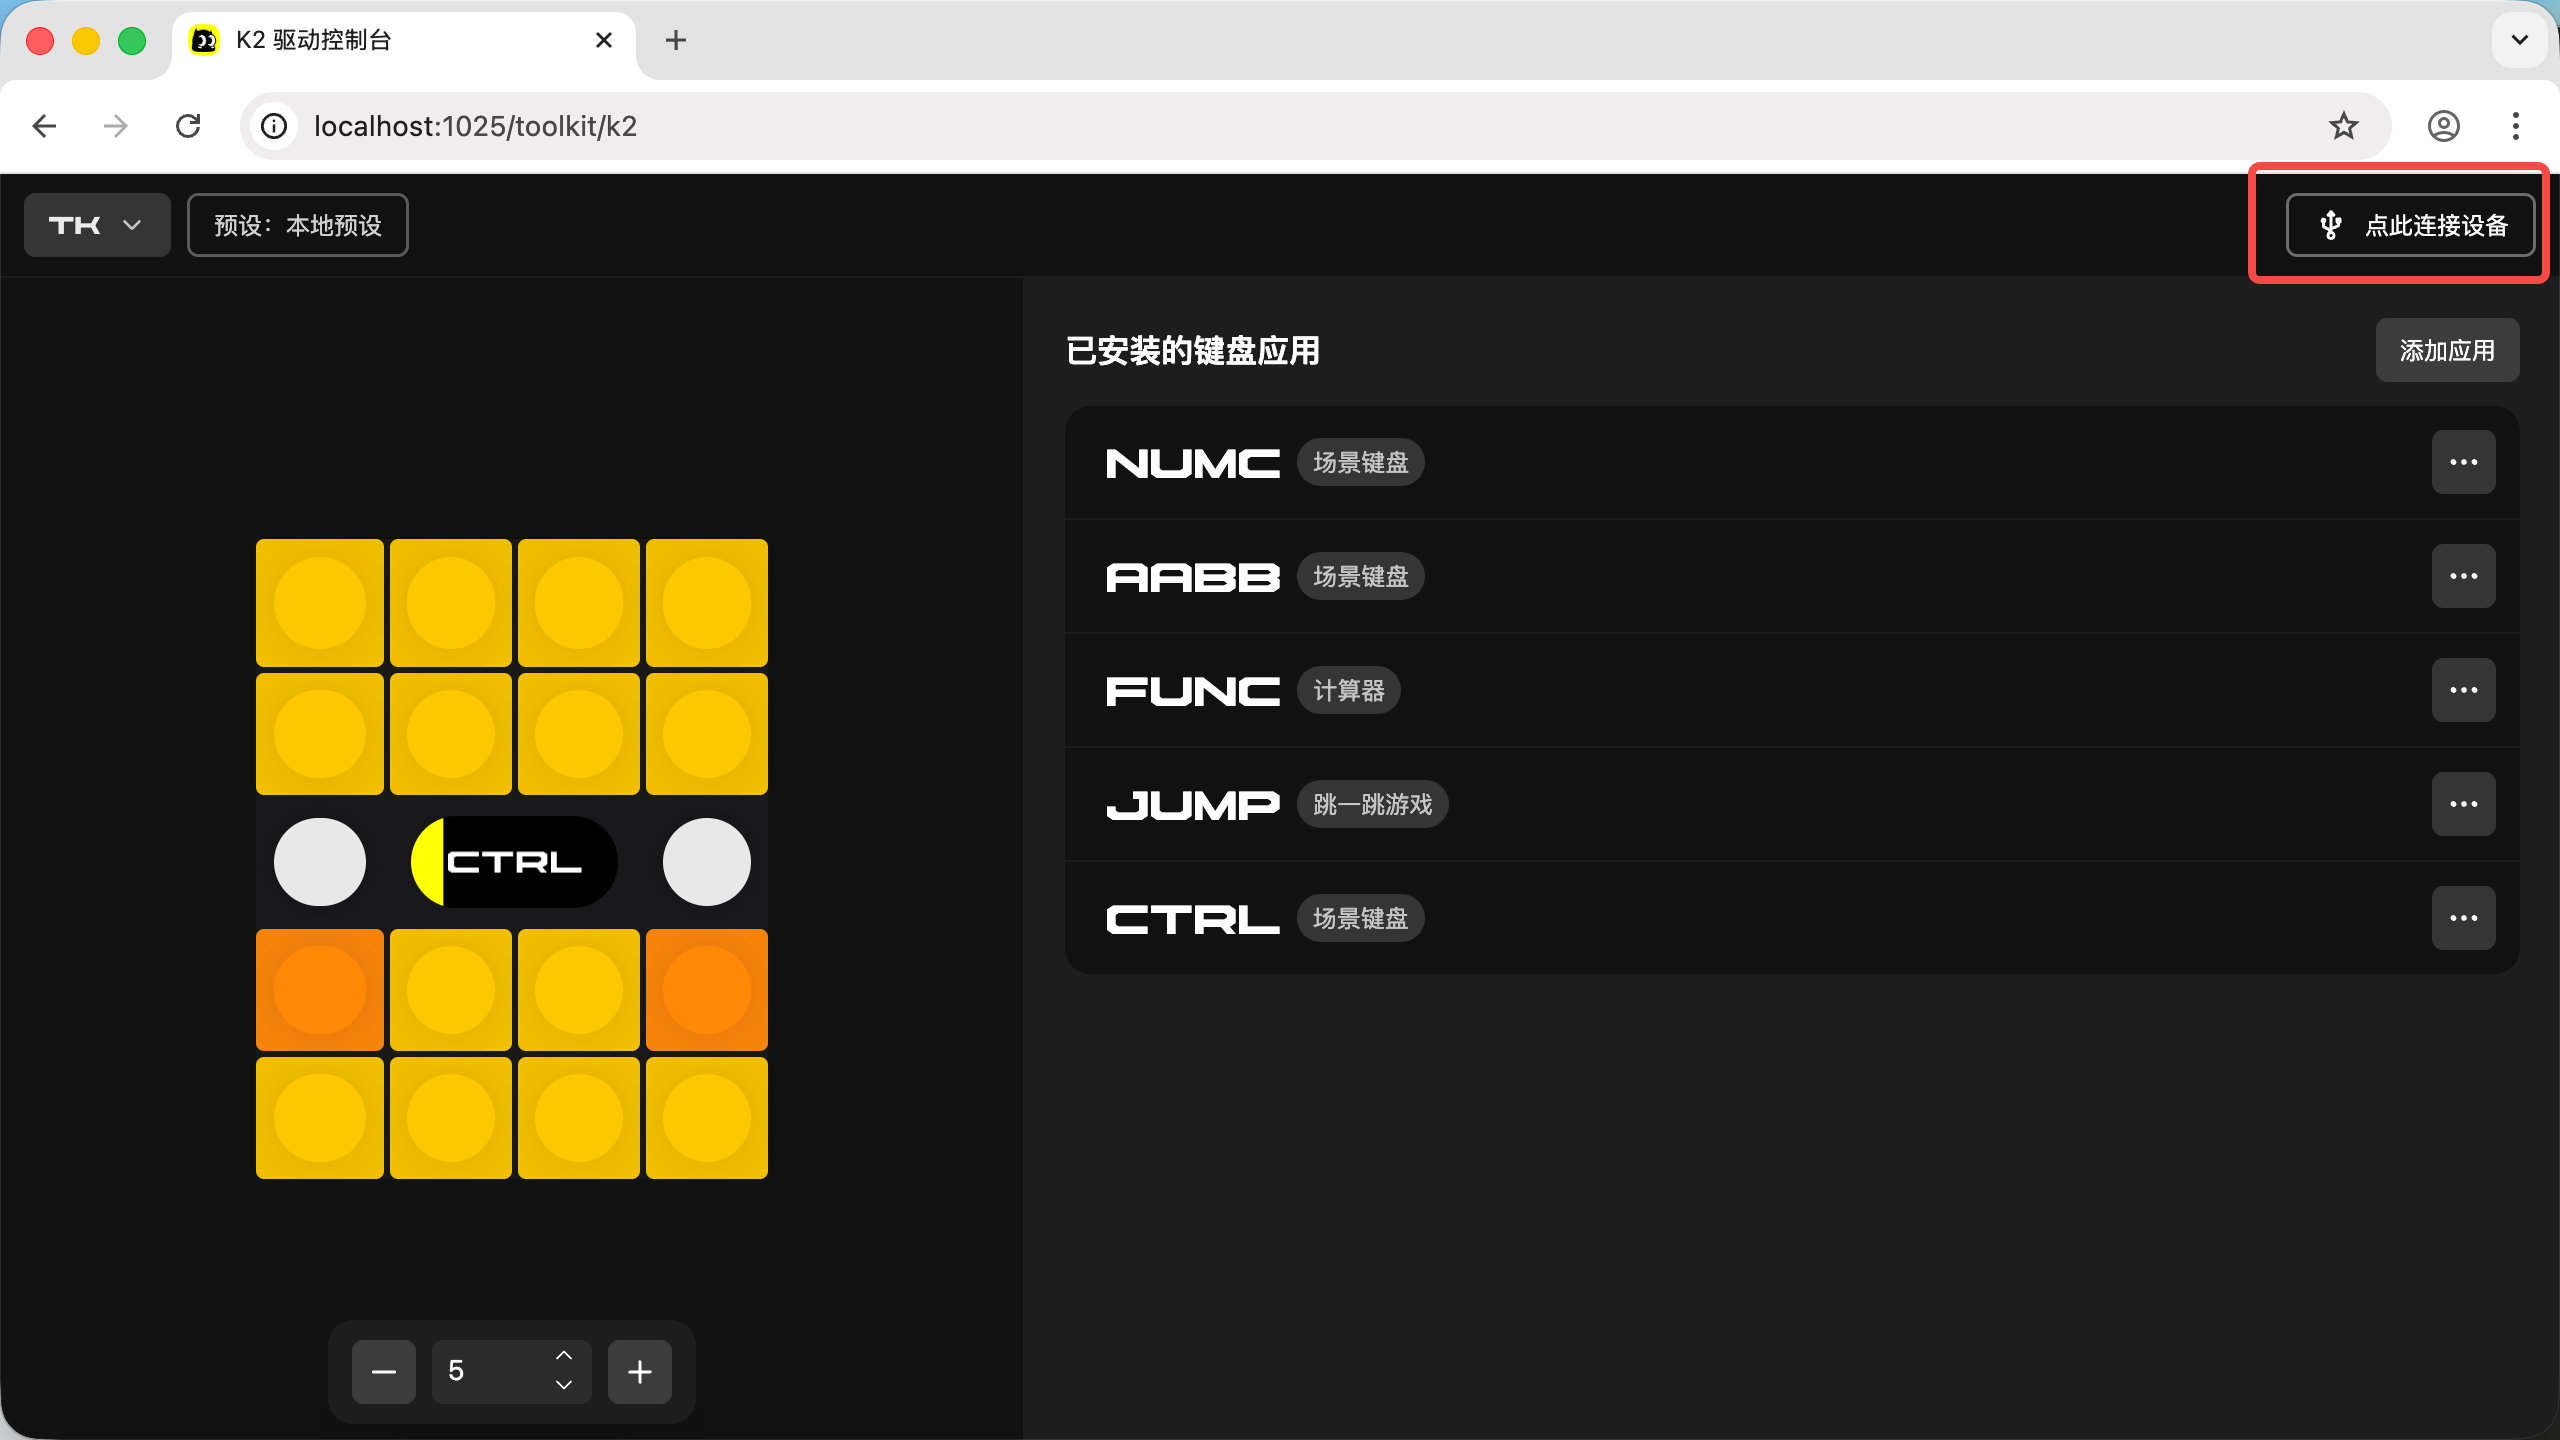
- On the right is the "Installed Keyboard Apps" panel, where you can rename, delete, customize, and add apps
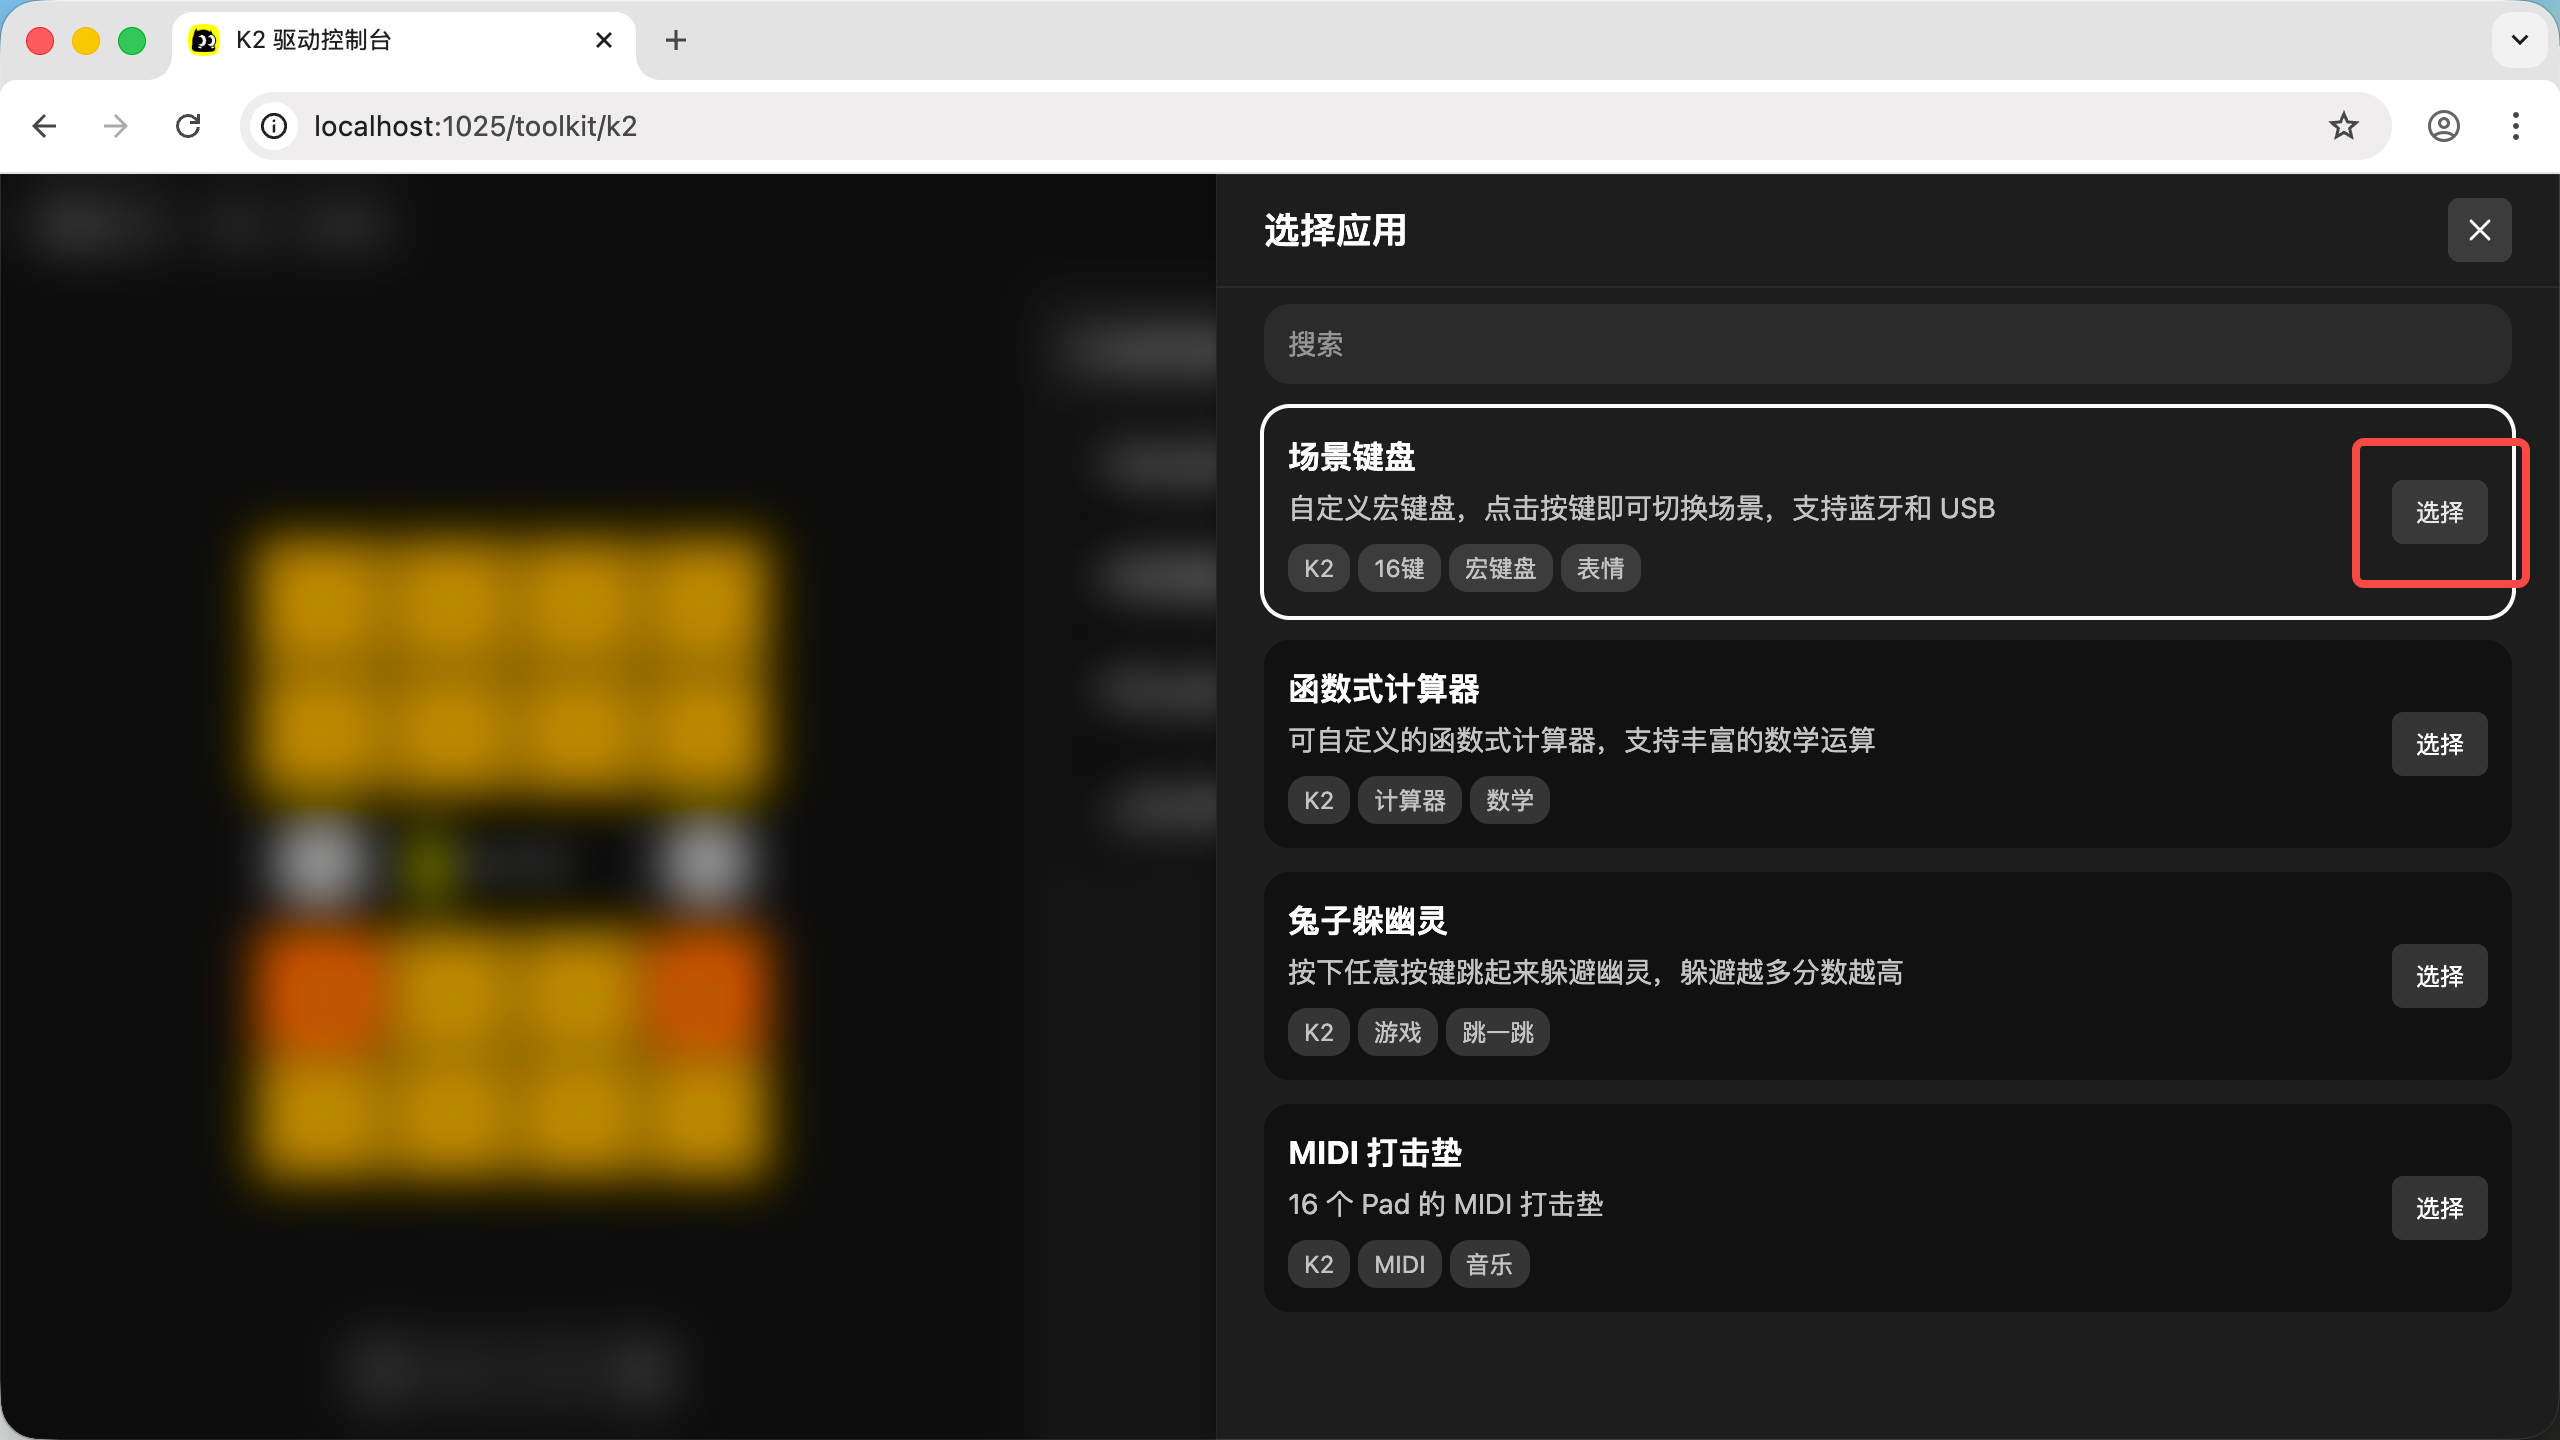
02. Try Adding a "Keyboard App"
- Click "Add App" on the right side
- The pop-up window shows all app types currently supported by K2. Here we select "Scene Keyboard", then click "Select"
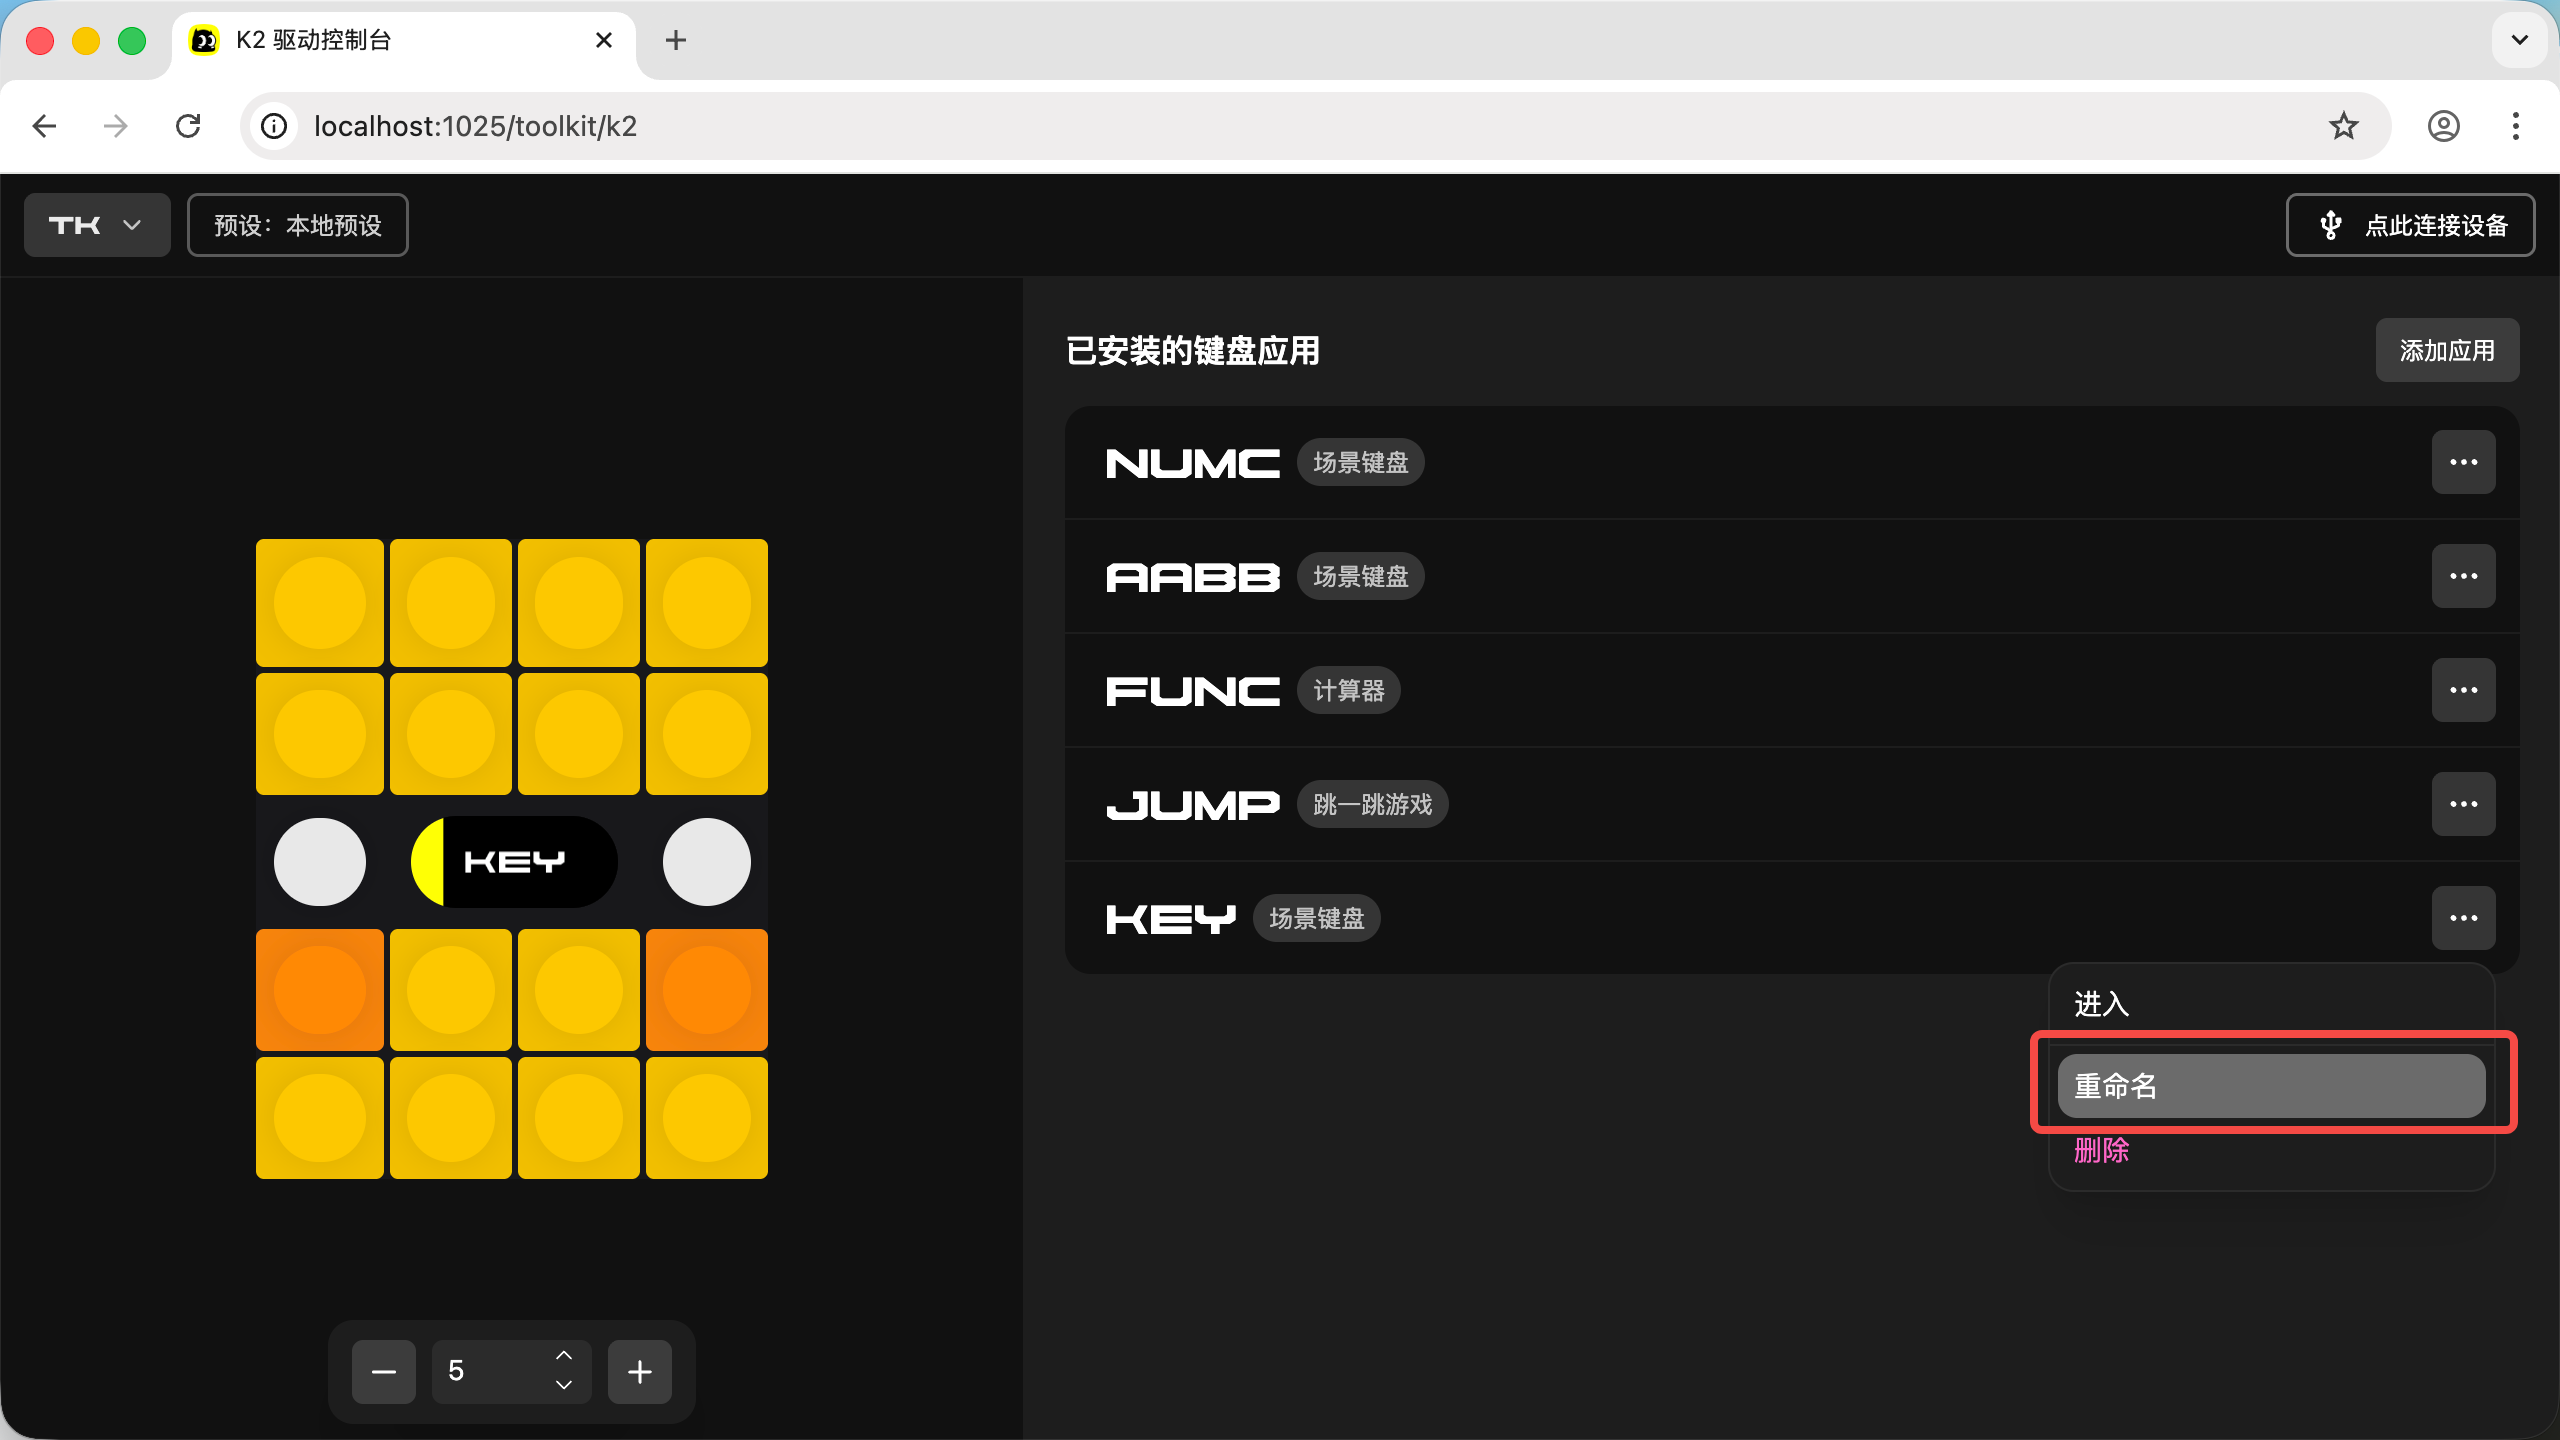
- After creation, you can see a new "Scene Keyboard" entry in the "Installed Keyboard Apps" list

03. Rename the Newly Created "Keyboard App"
- Click the three dots on the right side of the new app's row, then click "Rename"
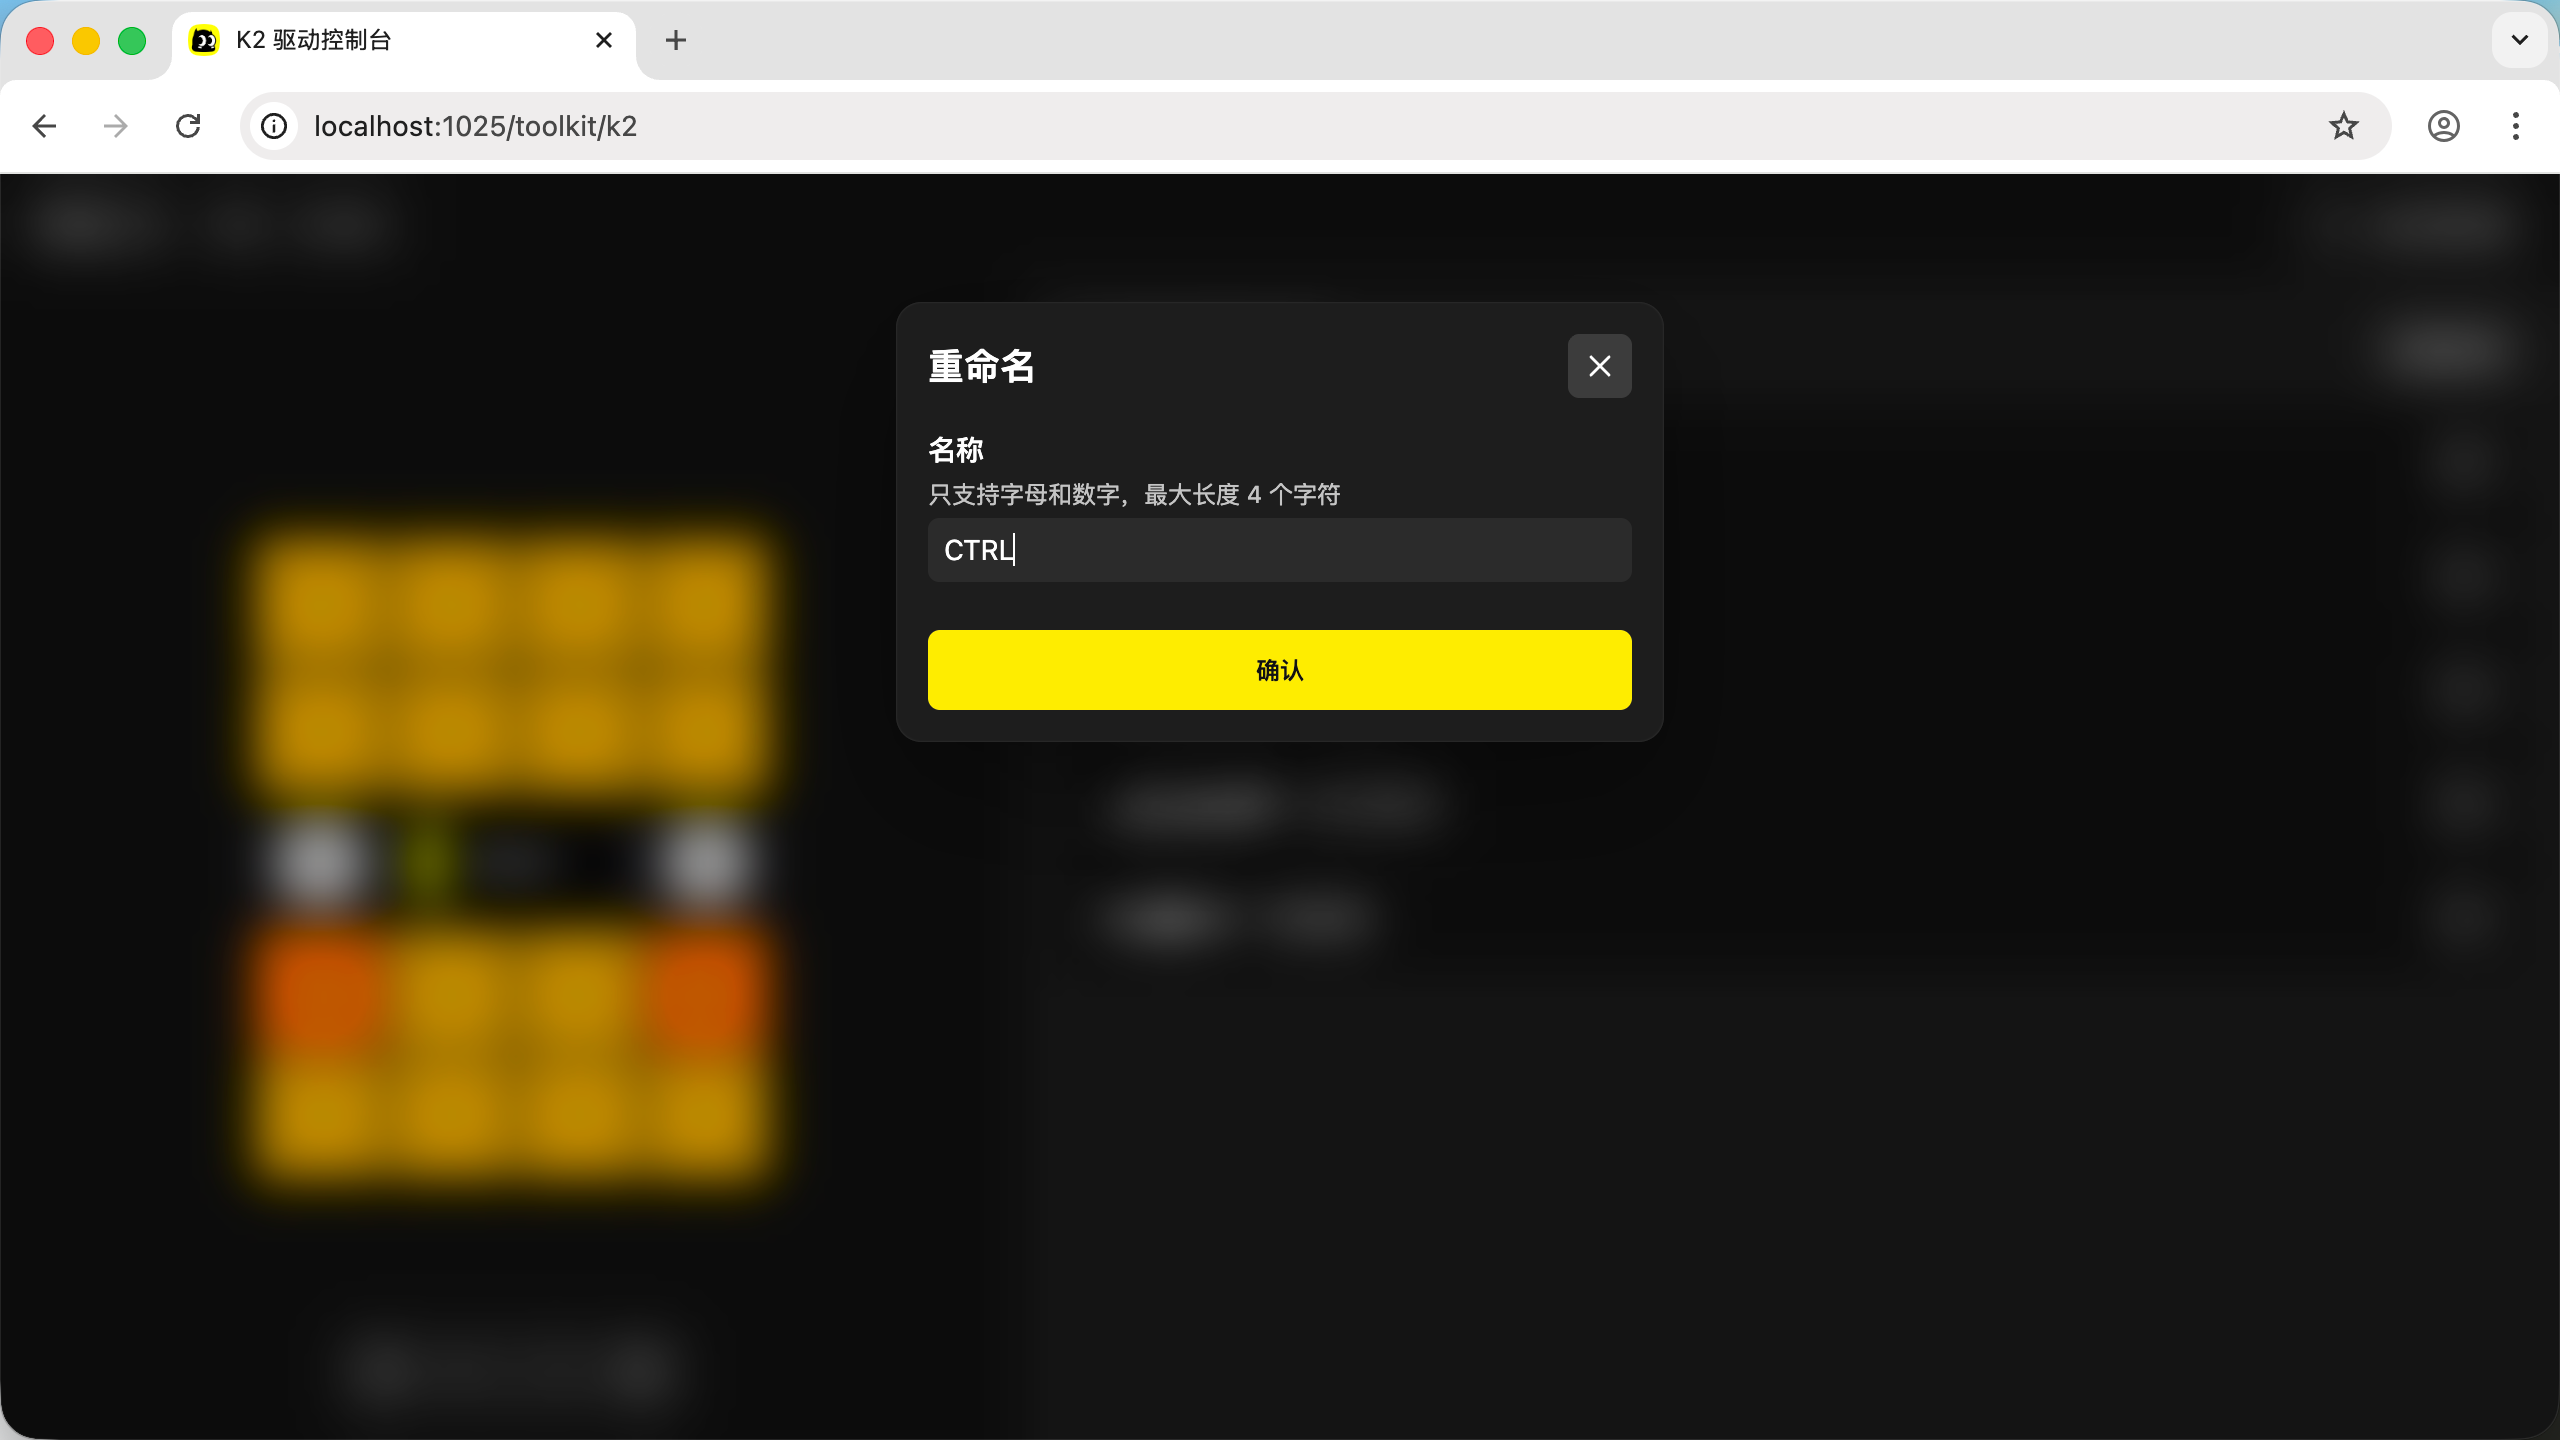
- Enter a name in the pop-up. The name can only contain numbers or letters, with a maximum length of 4 characters. Here we change it to "CTRL"
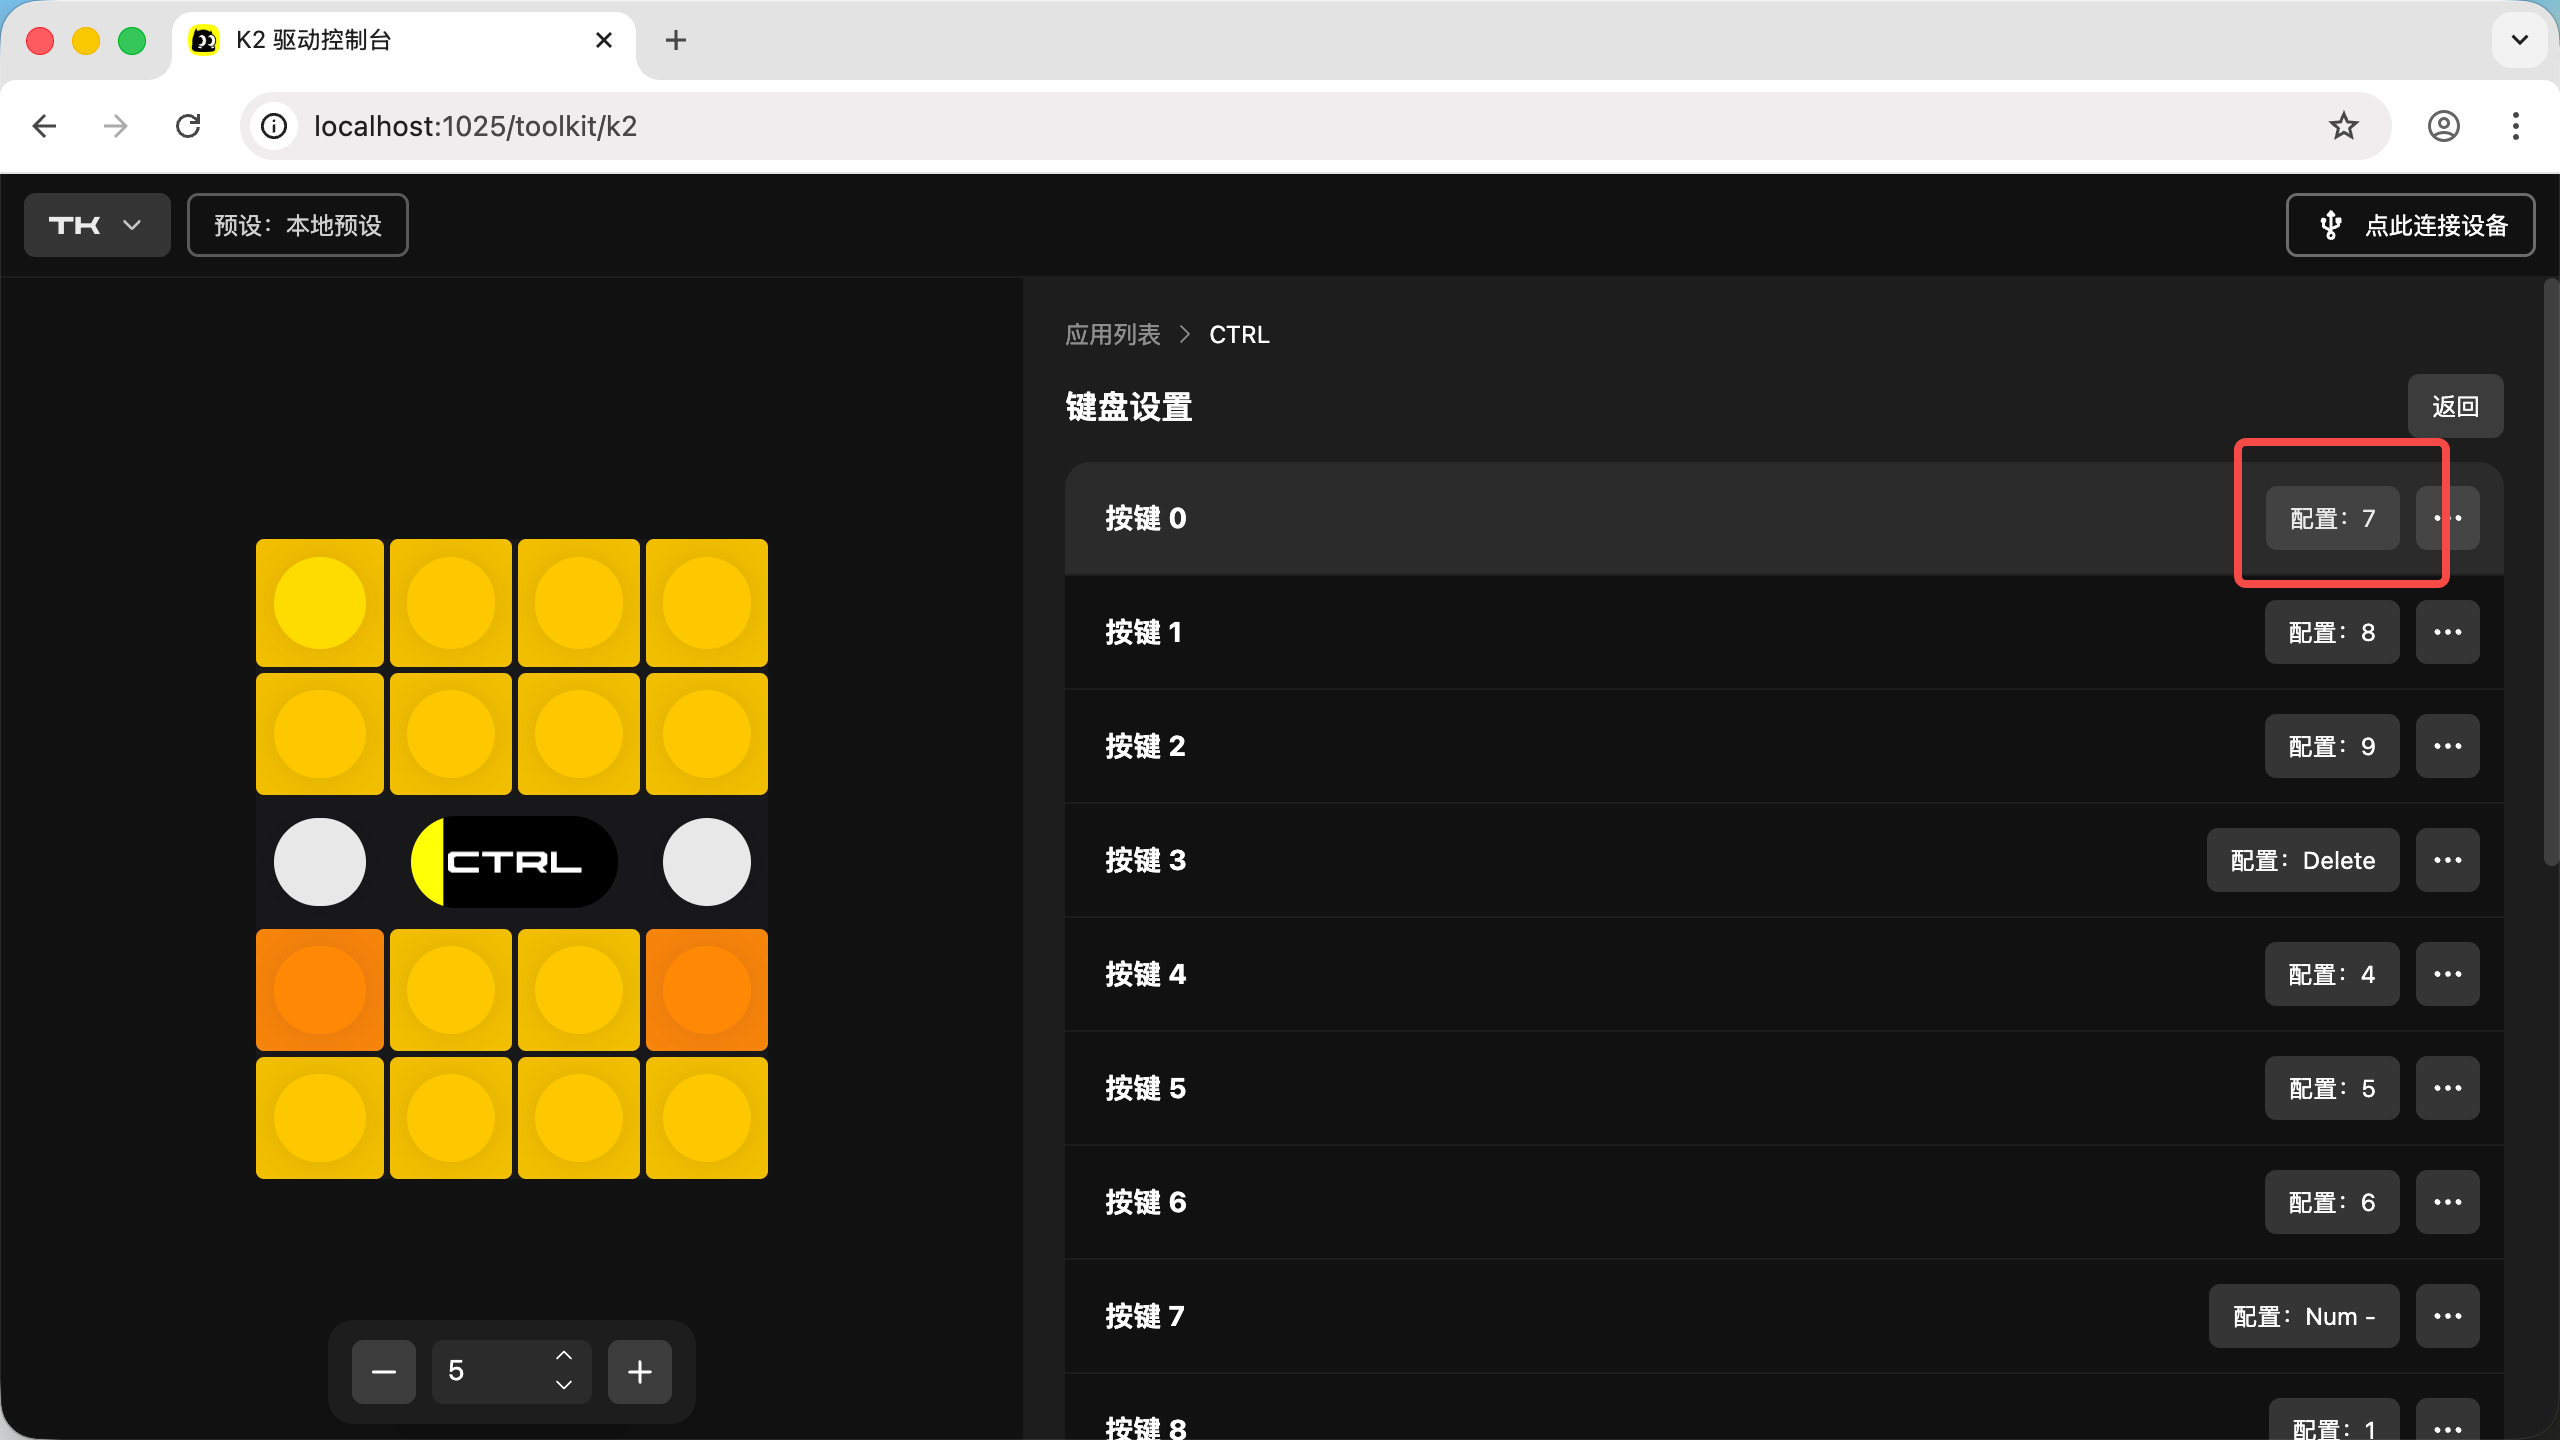
04. Set Key Mappings for the "CTRL" App
- Click the "CTRL" app to enter the "Scene Keyboard" settings, or click the "Enter" button on the right after expanding

- In the "Scene Keyboard" settings, the right side shows "Keyboard Settings". Each row corresponds to a key. Hovering over a row highlights the corresponding key on the virtual K2
- We'll change Key 0 to "Ctrl + C". Click "Config: 7" on the right side of Key 0
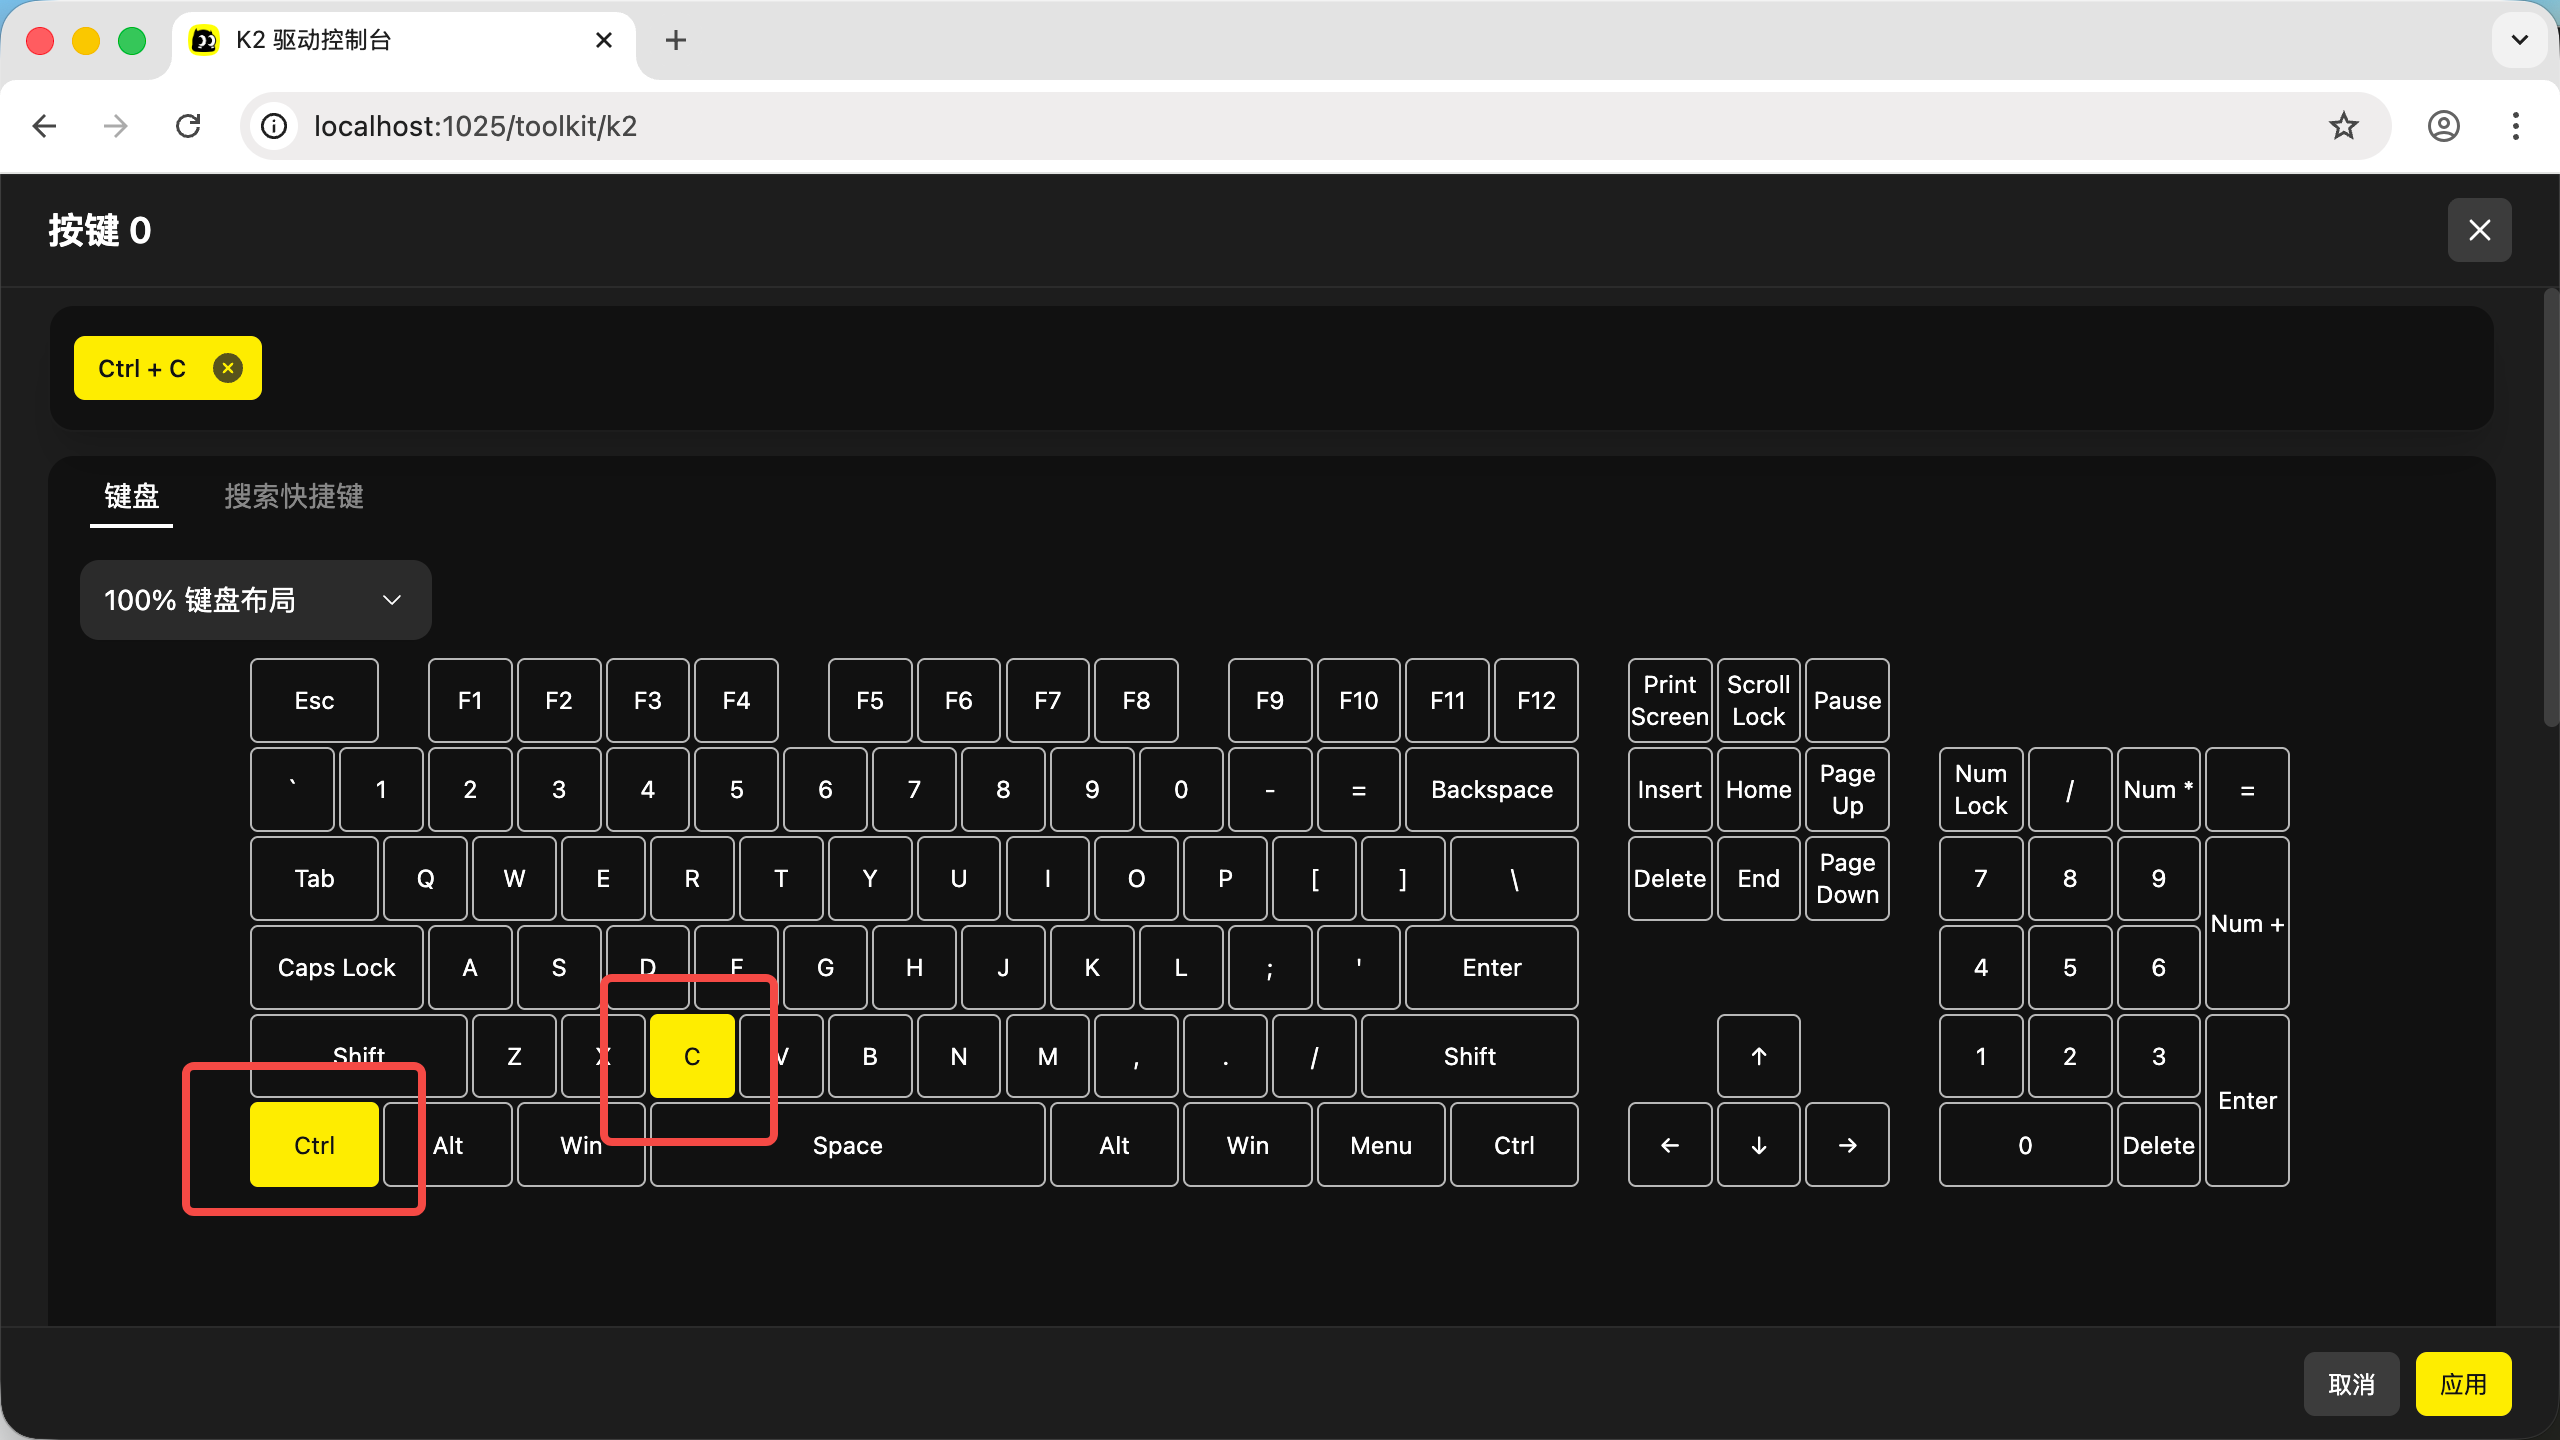
- The pop-up shows a visual keyboard. The yellow highlighted keys are the ones configured for this key. To configure "Ctrl + C", click Ctrl and C in sequence, and click 7 to deselect it
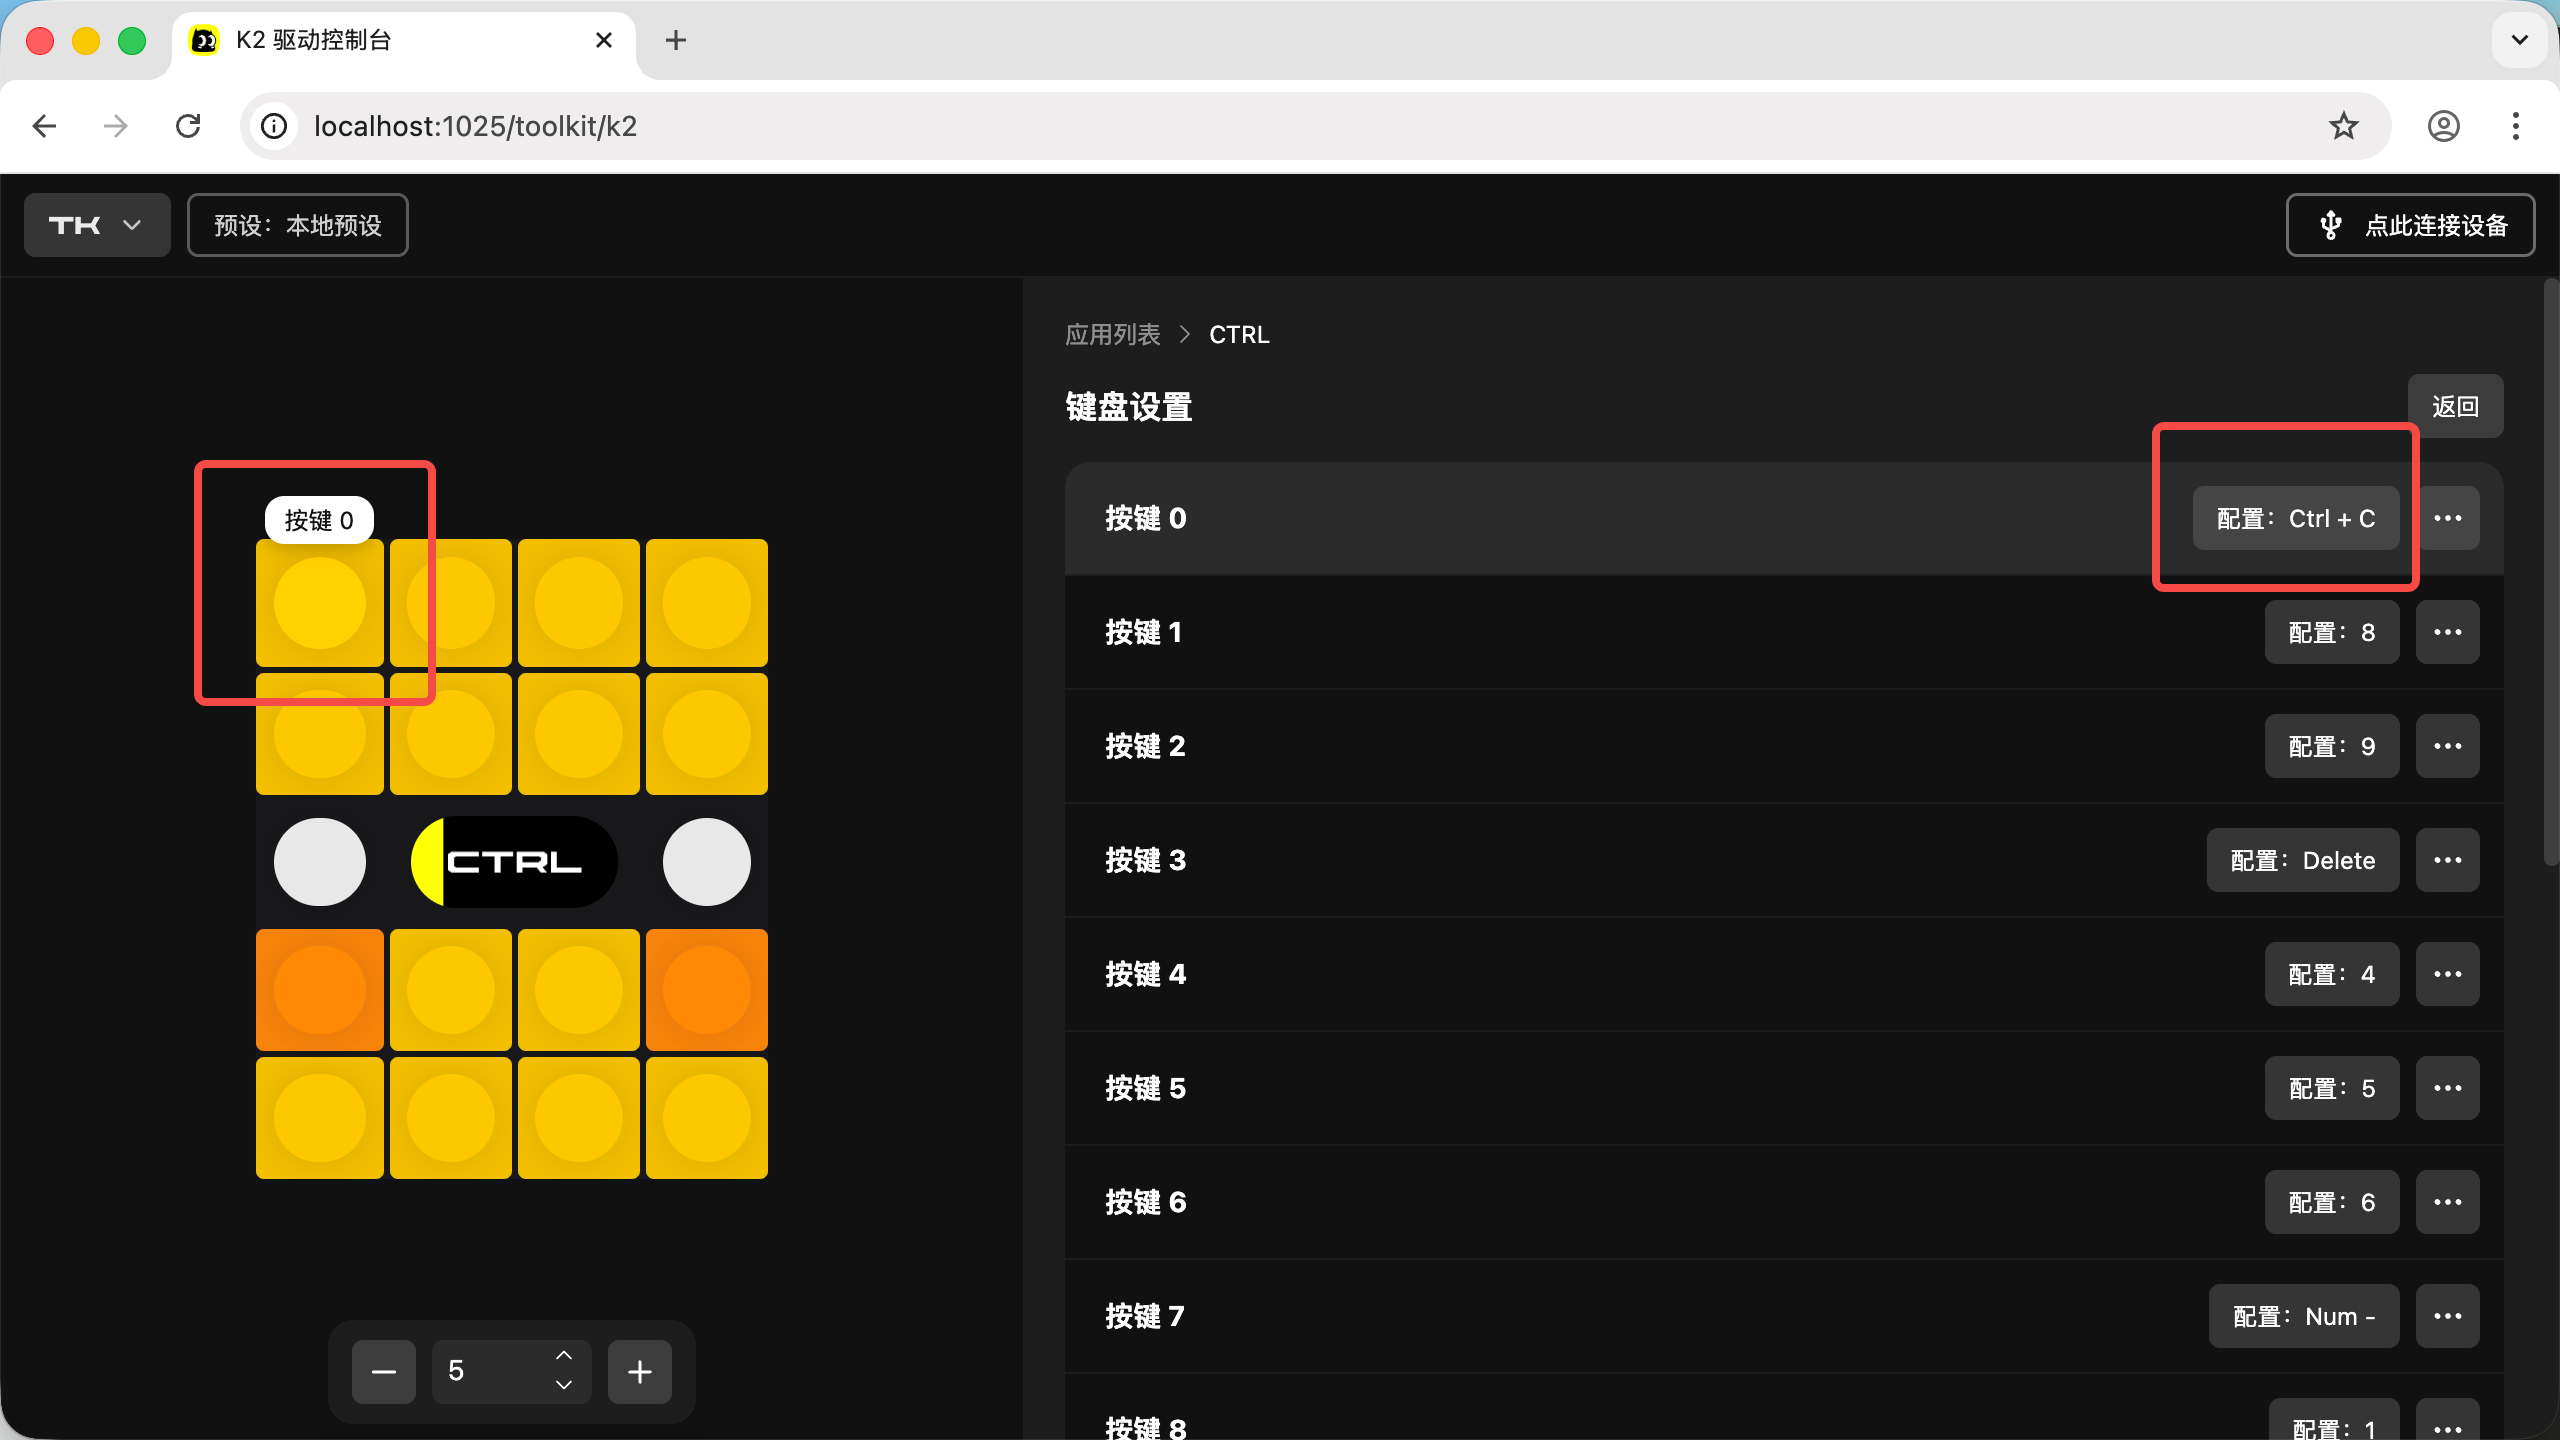
- Click "Apply" to complete the configuration of Key 0. It will return automatically, and you'll see that Key 0's row now shows "Ctrl + C"
05. Flash the Configuration to Your Real K2
Through the previous four steps, you've prepared a preset with 5 apps. Now you need to flash this preset to your real K2
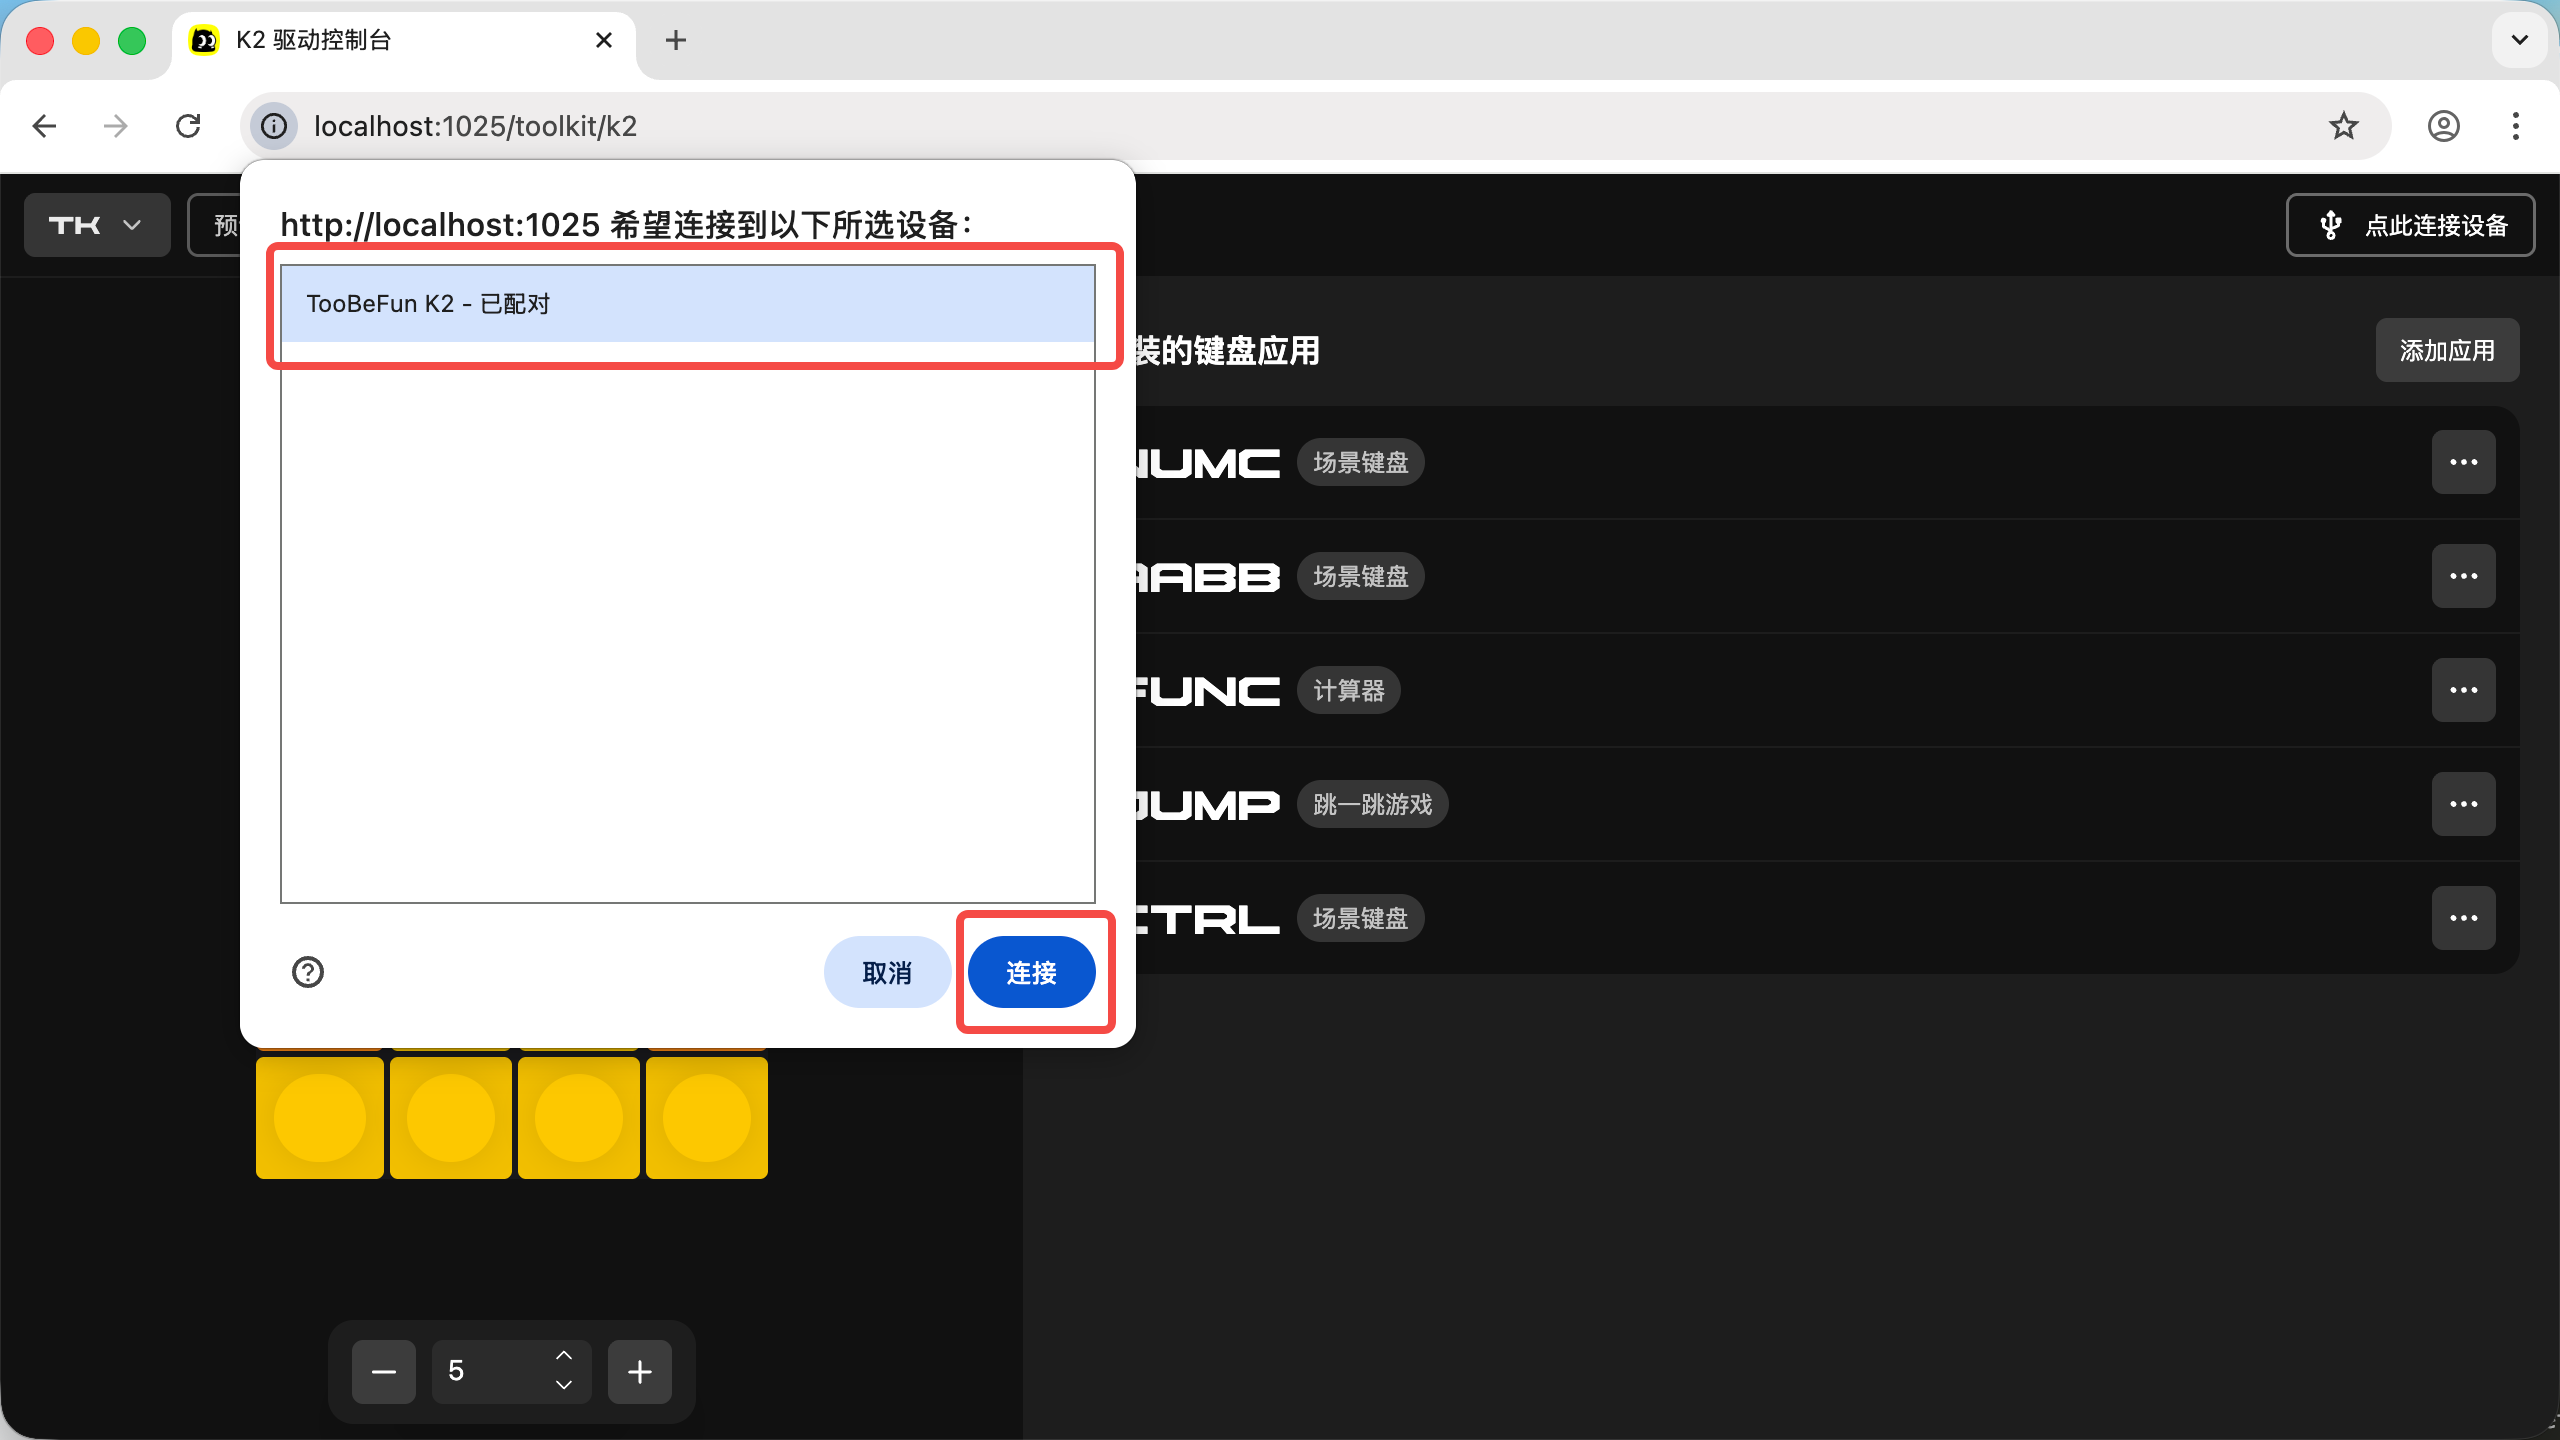
- Connect K2 to your computer using a USB-C data cable
- Click the "Click here to connect device" button at the top. If you're not using Google Chrome, please switch to Google Chrome
- Select "TooBeFun K2" in the device selection dialog to establish a connection
- After connecting, the K2 will display "SETUP", indicating it is being configured
- Next, click "Connected TOOBEFUN K2" at the top > "Write Preset to Device". Wait a moment for the preset to be written to the device. Finally, click "Finish Configuration and Disconnect" to restart K2 with the new preset
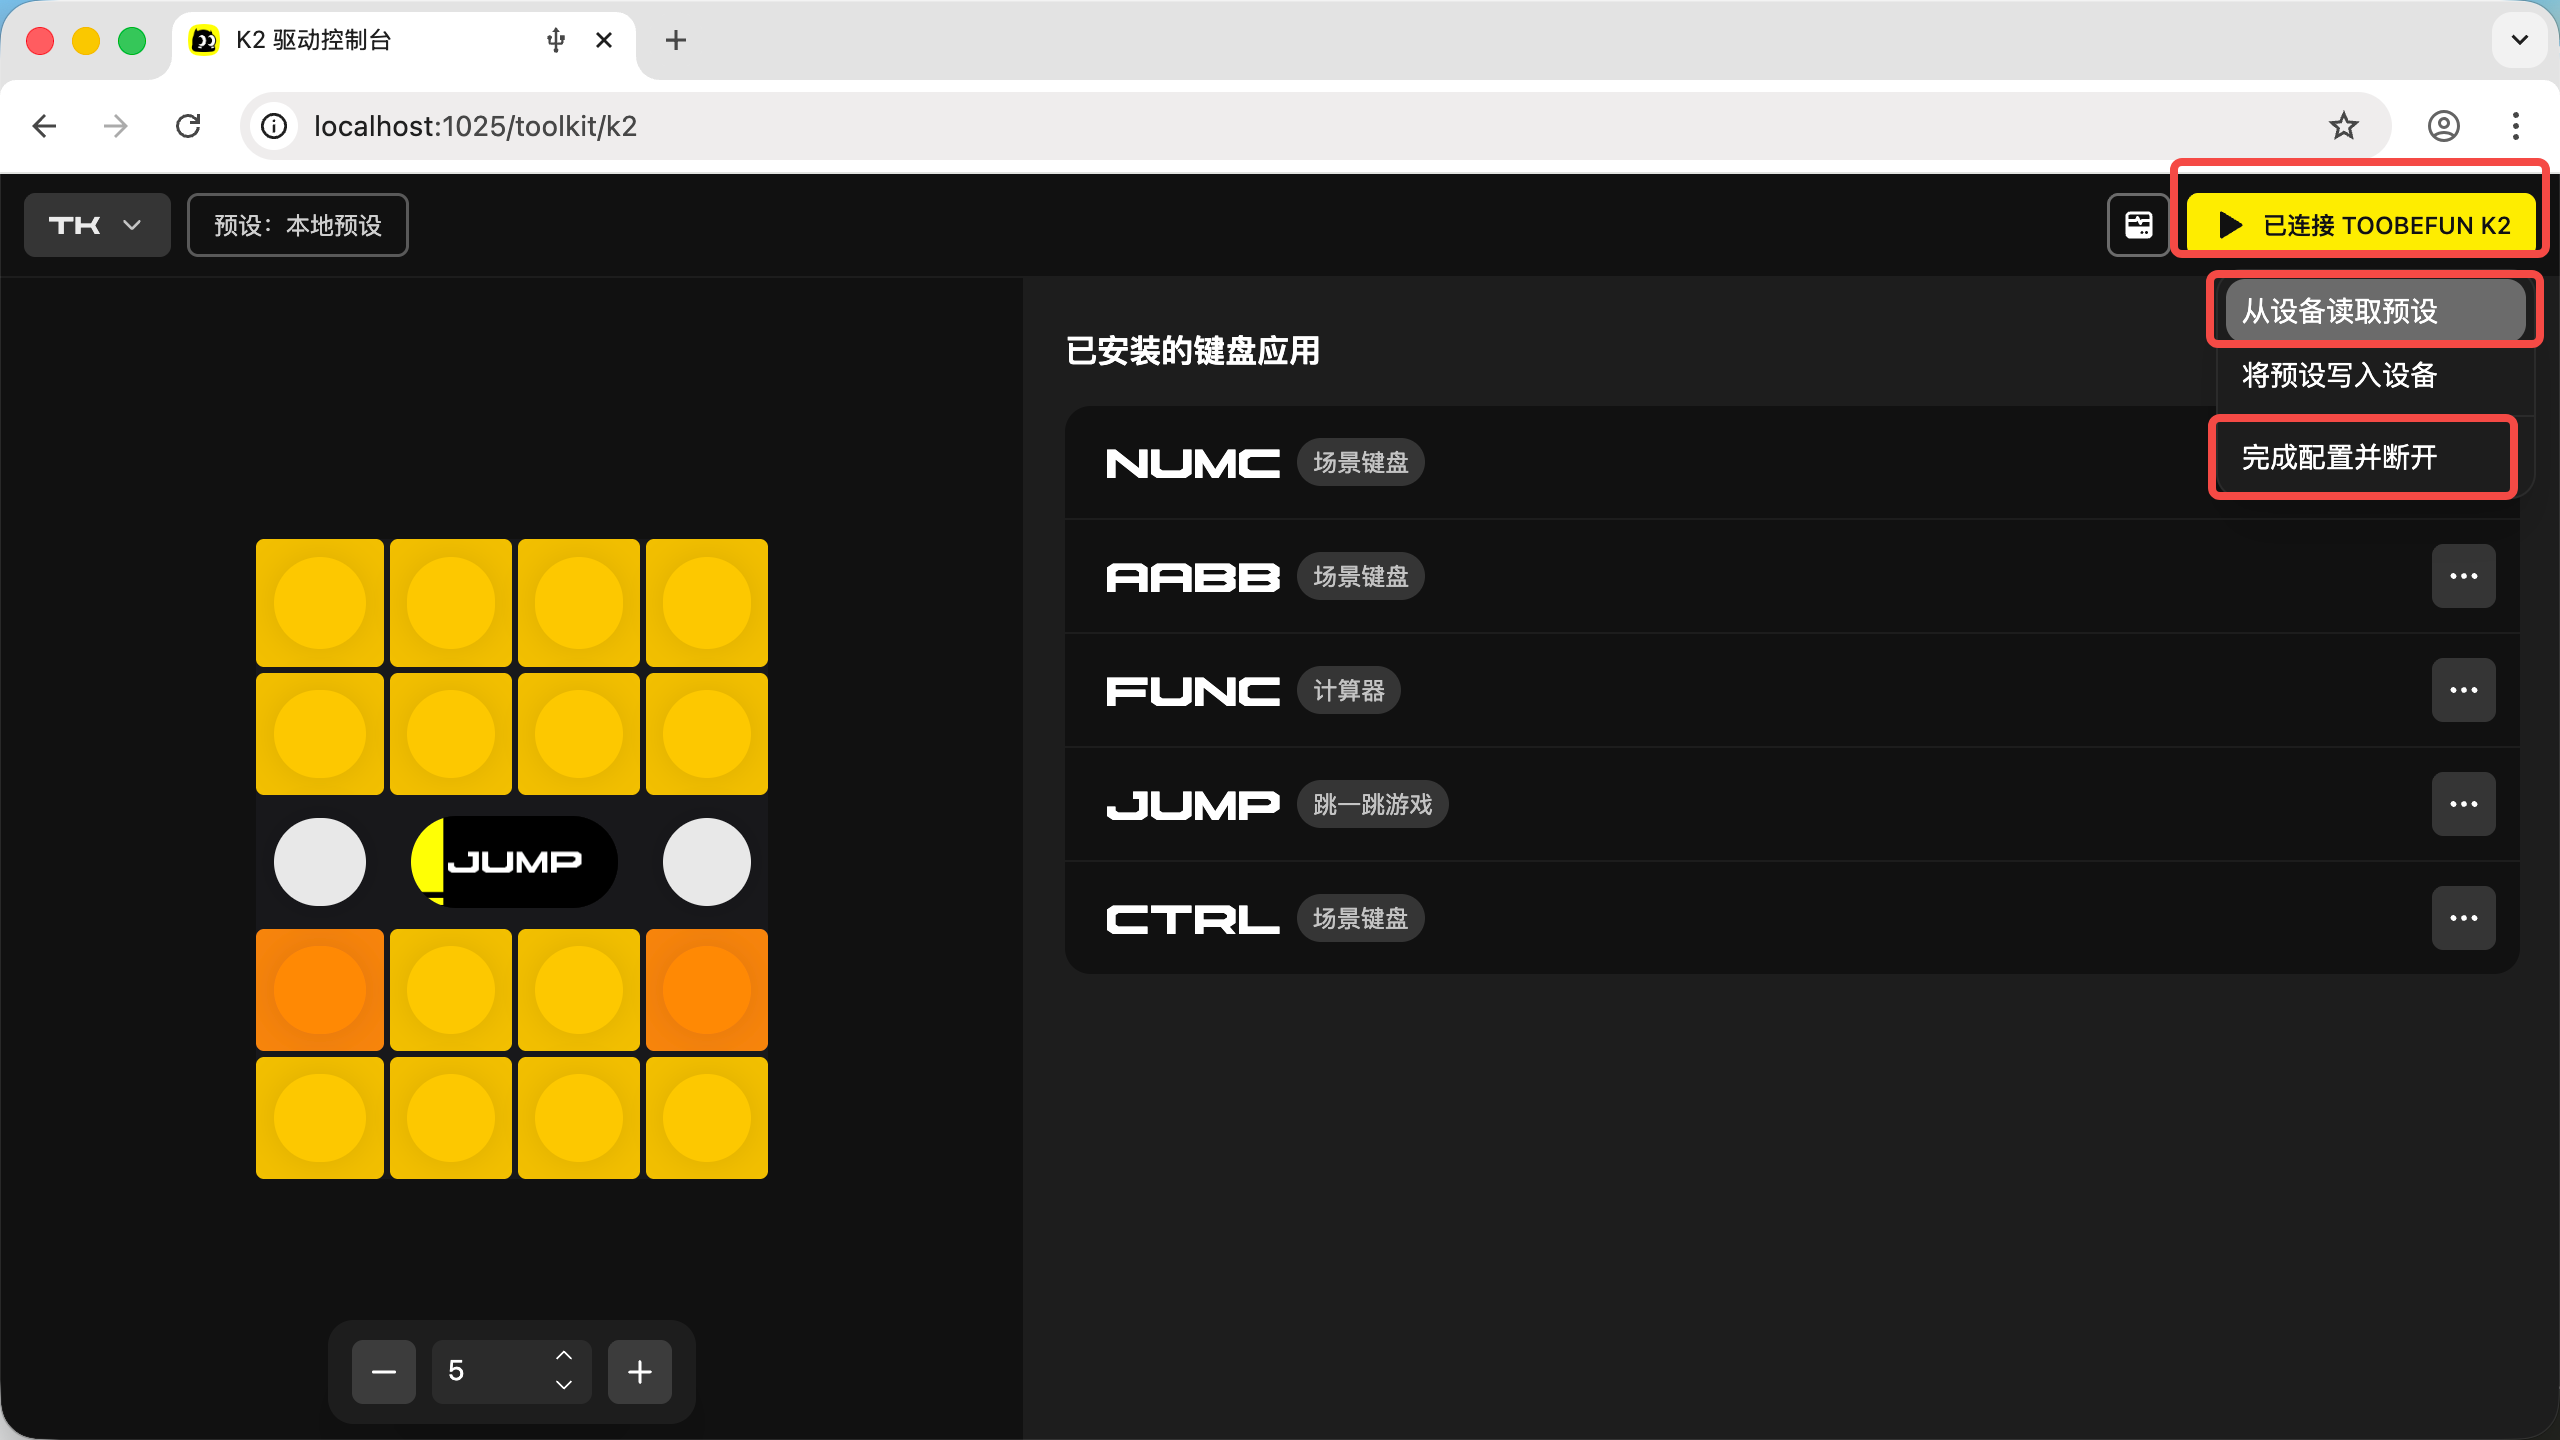
- After the above steps, you can long-press the left knob on K2 to enter the menu, switch to "CTRL", and then use Key 0 (top-left) to send "Ctrl + C" to your computer